Easy Installation of the Excellent Emporia Classic EV Charger
Choosing an EV Charger
Powering an electric vehicle at the ranch is only part of the story — doing it simply, reliably, and with an eye toward solar integration is the real goal.
As the Roy Creek Ranch solar system has evolved, each addition has been guided by a practical question: what works in the real world? After bringing the Hyundai Ioniq5 into the mix, the next step was clear — install a Level II charger that could support daily use while fitting cleanly into the existing electrical system.
This post walks through the installation of the Emporia Classic EV Charger — why I chose it, how it integrates with the ranch power setup, and what I’ve learned from using it. It’s one piece of a larger effort to move more of our energy use toward locally generated solar power, without adding unnecessary complexity.
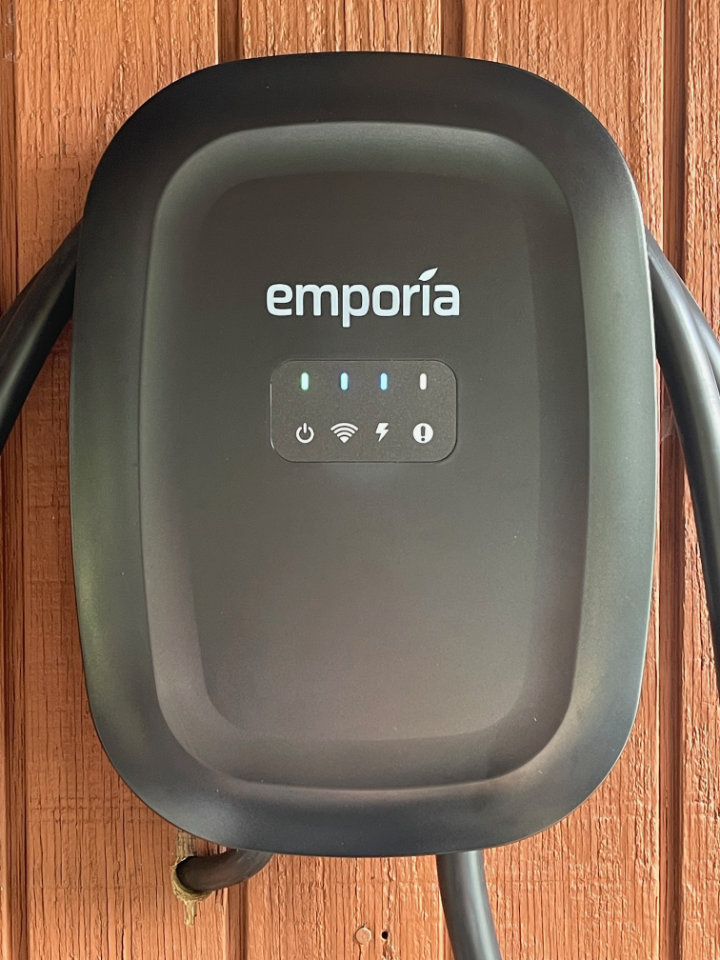
Emporia EV Charger — Best Value
When compared with other EV charging systems, the Emporia Classic EV Charger was the lowest price with many robust features. It can be supplied with up to 48 amps (when hardwired) or 40 amps with a NEMA 14/50 plug. It’s WiFi enabled, can be controlled via an app and supports extensive energy monitoring, especially when paired with the Emporia Home Vue Energy Monitor.
Using an existing load center
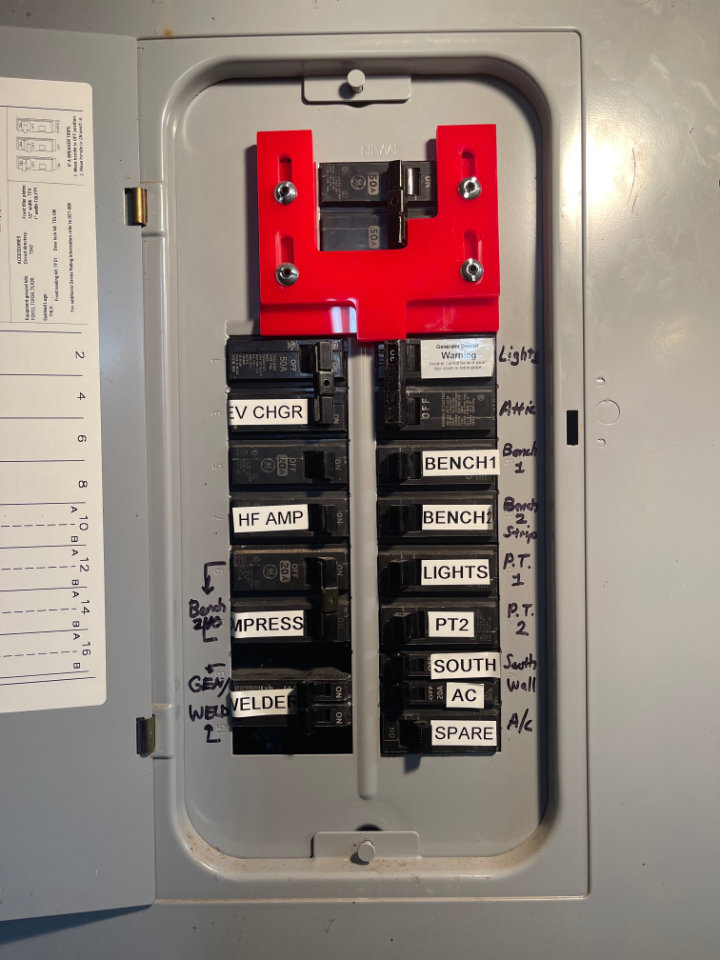
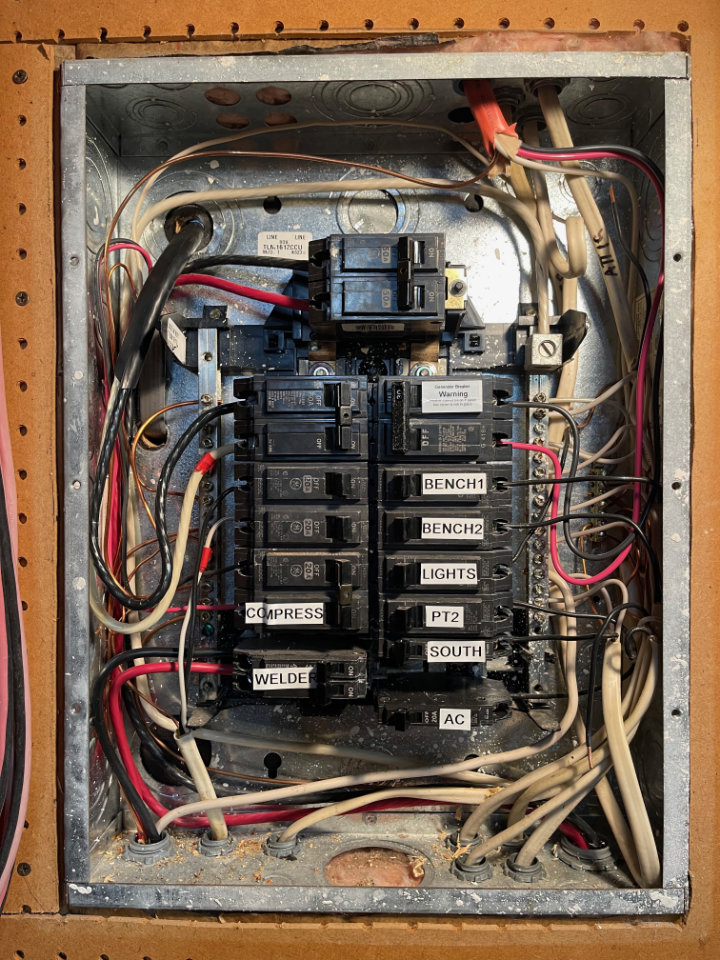
My plan was to connect the EV charger to the existing load center in the shop. It already had a feed from the electric utility service entrance, providing 50 amps of grid-supplied energy. A buried cable carries power from the service entrance to the shop load center, about 50 feet away.
Besides grid power supplied from the service entrance, the Ranch solar energy system is also connected to the shop load center. It is configured with a physical lockout so that power can either be supplied by the grid or the solar system — but not both at the same time. Most of the time, I prefer to use locally generated solar power, but the grid is available for those cloudy days when we need to charge the car or work in the shop.
Robust construction
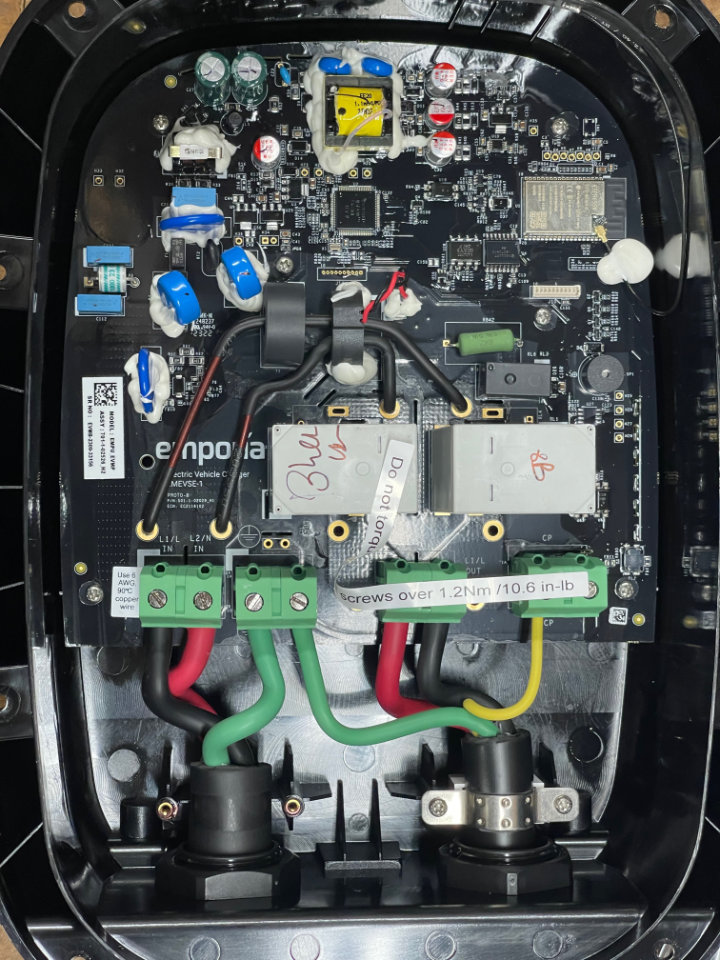
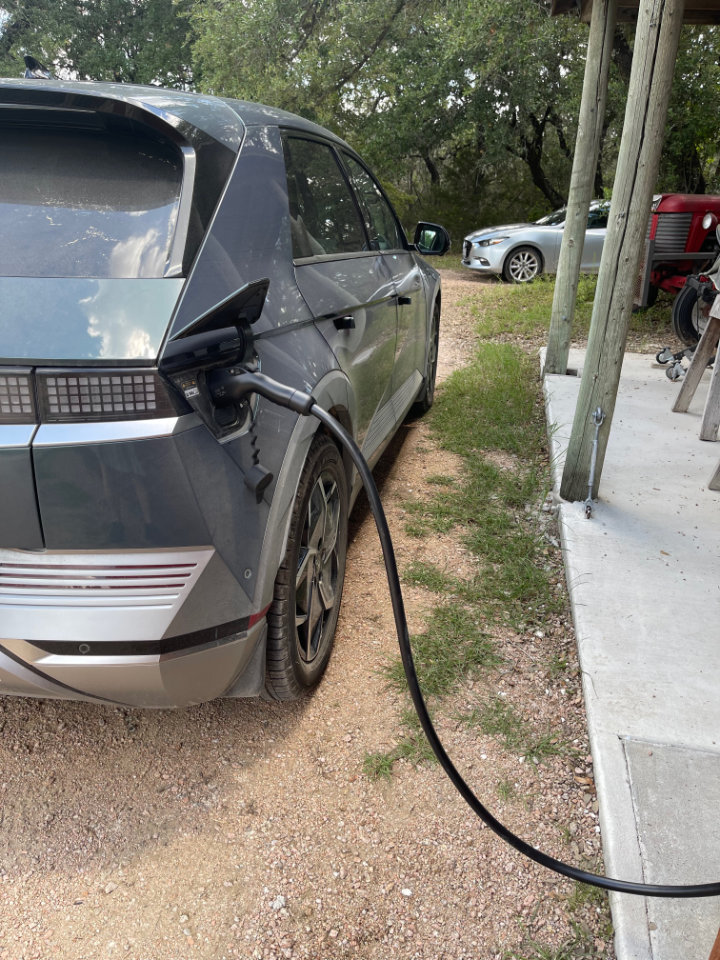
A look inside the EV Charger reveals a sophisticated piece of kit. Mine came with the NEMA 14/50 plug and a 6-foot or so cable, but I removed that to feed the charger directly from a 50-amp breaker in the load center. The sharp-eyed microcontroller aficionados among you will notice an Expressif ESP 32 device in the upper-left corner of the charger photo.
Installing the Emporia EV Charger
Installation is easy. One simply mounts the supplied bracket to a vertical surface. The charger then mounts the to bracket with four supplied machine screws. A holster and mounting screws are also supplied for the charging plug.
Mounting Bracket
I mounted the charger bracket on the outside of the same wall where the load center lives. All that was needed was a hole large enough for a 6/4 240 VAC cable. In no time, I had that cable connected to a 50-amp duplex breaker in the load center, routed through the hole into the Emporia Charger and connected to the “Line In” phoenix connectors. Complete installation instructions can be found on the Emporia site.
Wired in or NEMA plug?
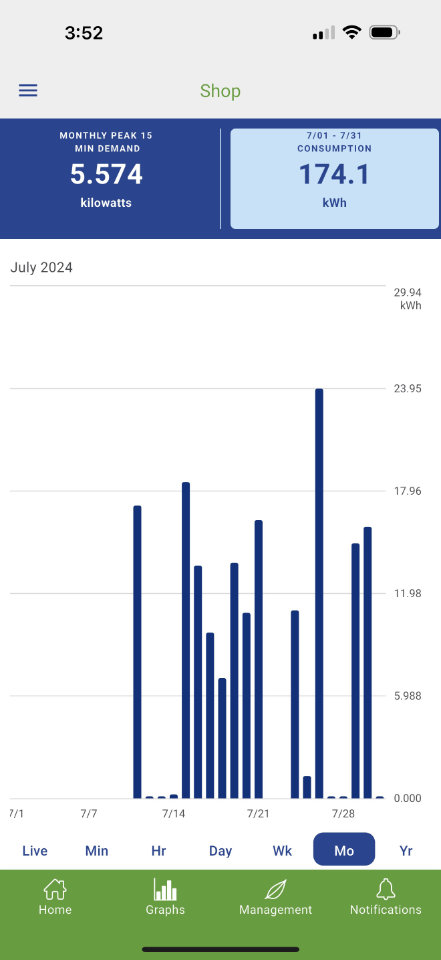
The Emporia EV Charger is capable of charging a vehicle at 40A on a 50A breaker with the NEMA 14-50 connector or 48A when direct wired to a 60A+ breaker. Because the shop load center is limited to 50 amps though, I can only charge the Ioniq5 at a maximum or 40 amps That still 9600 watts! Well into the Level II charger range. The typical limiting factor on charging speed will be solar production.
WiFi Monitoring
The Emporia Energy app and a Wi-Fi connection are required to take advantage of its smart functions, including: changing the charging rate, integrating with Emporia products and other smart devices, and energy management features. The app is available from the Apple app store or Google Play, or from emporiaenergy.com/app. One must also create an account to start the setup process.
An Excellent App . . .
Once set up, you can adjust the charge rate to match your breaker size and installation type, as well as to use Emporia’s other features. When setting the breaker size, a PIN must be created in the app. The charger can be connected to the local Wi-Fi through the app as well. Charging data can be viewed by minute, hour, day, week and year, and downloaded as a CSV file for analysis in a spreadsheet. The app is also used to connect and monitor other Emporia devices like a Home Battery or Smart Plugs.
Future Monitoring
Using Amazon Alexa and Google Home Assistant, Smart Plugs are used in home automation systems to remotely control 120-volt devices like lighting. What makes Emporia Smart Plugs better however, is they can monitor power usage when combined with the Emporia Vue Energy Monitor. I’ll have more to say about home automation in a future post.
At the moment, I’m only using the app to control and monitor the Emporia Classic EV Charger. I have the Vue Energy Monitor system, but haven’t installed it yet. As my solar installation grows, it will come in handy to understand how much power we use around our home and plan future expansions. I don’t plan to become 100% energy self-sufficient, but I would like to transfer as many loads as possible to solar generation in order to maximize our use of available solar power. Stay Tuned . . .
Solar Resilience Project Series
Follow the evolution of the Roy Creek Ranch solar system:
Phase 1 — Foundational Systems
- Solar Power for the Amateur Radio Station (2015)
- Solar Powered Rainwater Project (2017)
- 2 kW Shop Solar System (2019)
- Build a Handy 12-Volt Solar Generator with LiFePo4 Batteries (2023)
Phase 2 — Expansion & System Upgrades
- Solar Power System Upgrade (2022)
- The Really Big Lithium Battery (2023)
- Solar EV Charging — Ioniq 5 (2024)
- Inverter Upgrade for EV Charging (2025)
- Solar Garage EV Charging (2026)