Building a Solar Garage for EV Charging (10.5 kW System)
At a Glance

• Panels added: 24 × 250 W = 6 kW
• Combined System Peak: 10.5 kW
• EV charging rate achieved: 9.6 kW
• Build timeframe: About a year (with interruptions)
• Primary purpose: Faster EV Solar Charging
The Solar Garage is producing power.
After purchasing an Ioniq5 electric vehicle (EV) last year, it became obvious that increasing the solar array size would be necessary. For reference, the Hyundai Ioniq 5 supports Level-2 charging rates up to about 11 kW depending on configuration.
The original array, completed in December 2022, could charge the EV—but sometimes required two full days to replace the energy used on a typical trip into town. We were getting significant energy from the array, and defrayed most of the “fuel” costs of our new EV, but still had to resort to grid power for those times when we had a “quick turnaround.” Trips into town on consecutive days required the use of grid power.
The result is a 6 kW solar structure that both shelters the EV and, when combined with the original array, provides enough power to charge it at full Level-2 speed.
It started with a design idea
Like most projects at Roy Creek Ranch, this one started with a simple idea and a long list of practical constraints.

My friend Joe, who had designed the first array, was over for dinner one evening when I broached the topic. “I’ve been thinking about adding a second array to the solar plant.” There were several design ideas:
• Put an unused excavation area to productive use
• Support 24 additional panels
• Protect the EV from hail
The hole resulted from the contractor excavating dirt for use to correct landscaping needs closer to the house. Over the intervening years, it had just become a collection point for construction debris and cedar slash from clearing land. I would have to clean up all that debris.
Problems Solved
Two practical problems drove the decision to build the solar garage:
- Provide additional power for faster EV Charging
- Improve resilience during extended power outages
Design Constraints
Like most projects, the design was driven more by constraints than ambition.

- Fit within the excavated hole
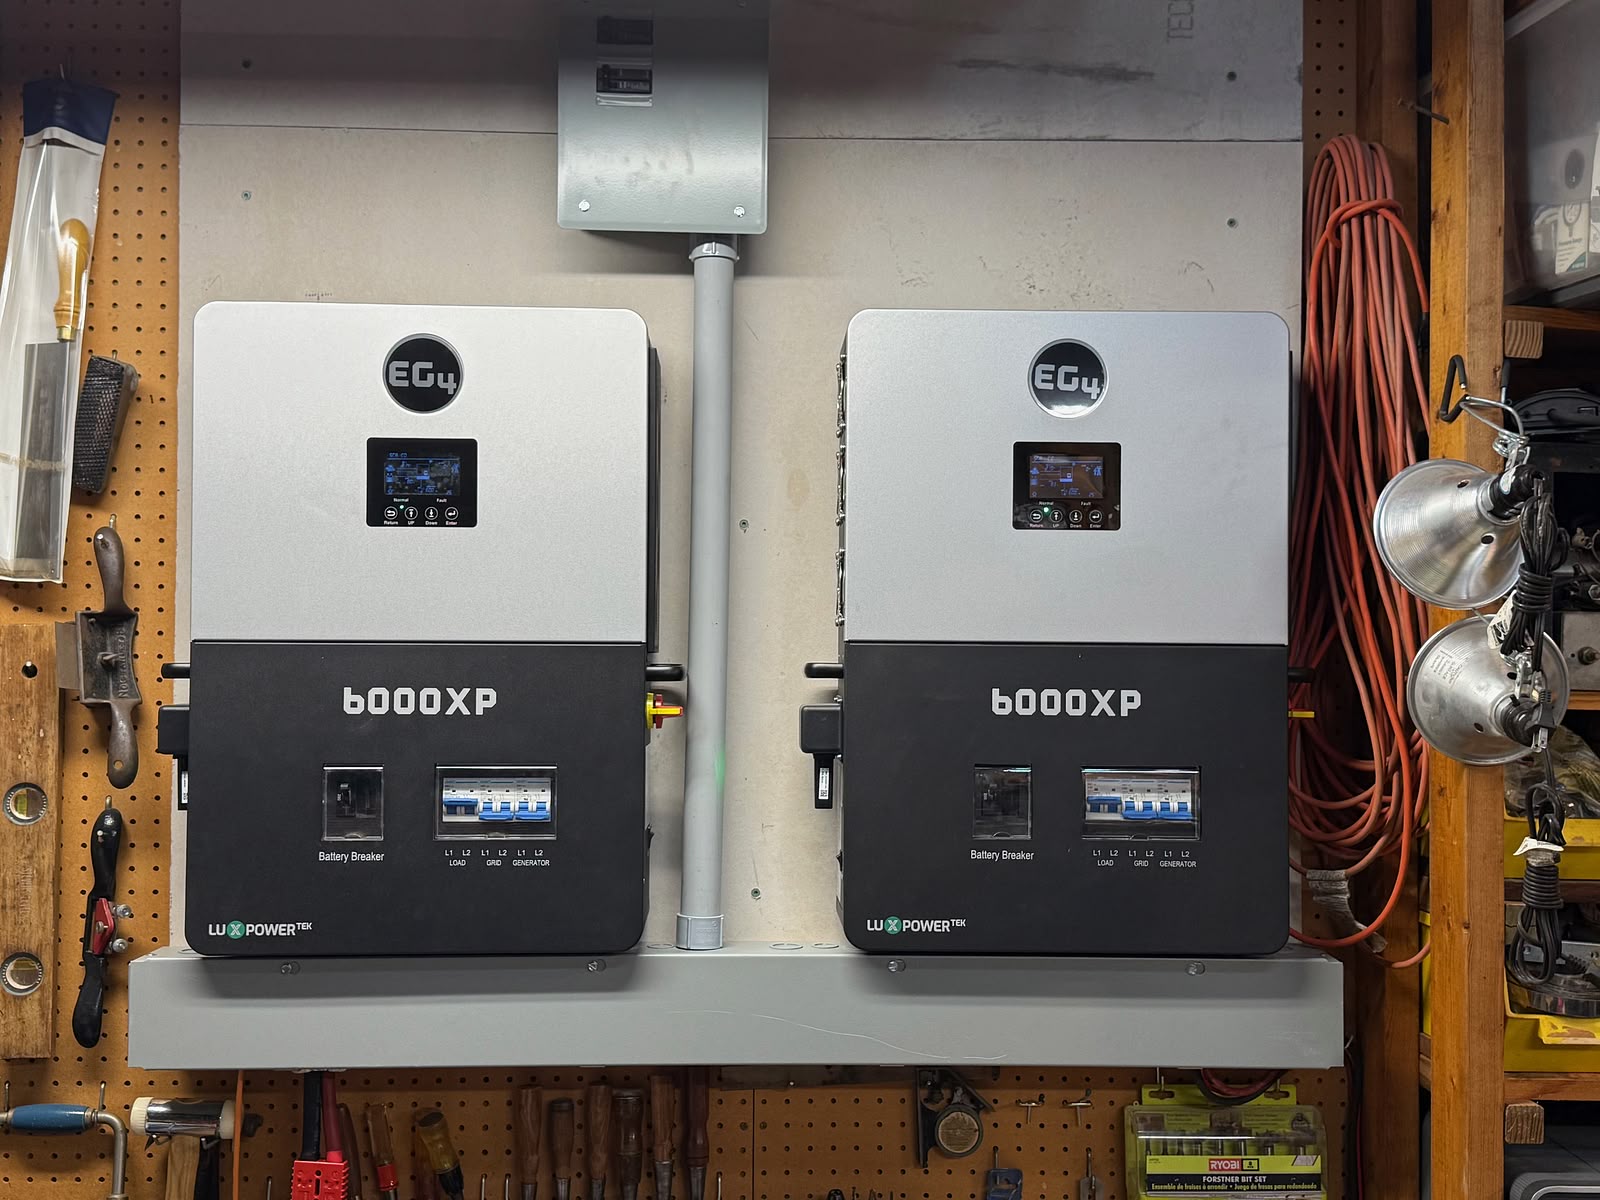
- Close to the inverters
- Return power to the garage
- Pressure-treated lumber
- Limited labor resources
- Minimize cost
How We Built It
Once the basic concept was clear, the remaining challenge was turning the idea into a structure that two people could realistically build.
The garage was designed to be simple, durable, and buildable with limited labor resources available on site. Two structural decisions ultimately determined whether the project would succeed: the foundation and the truss design.
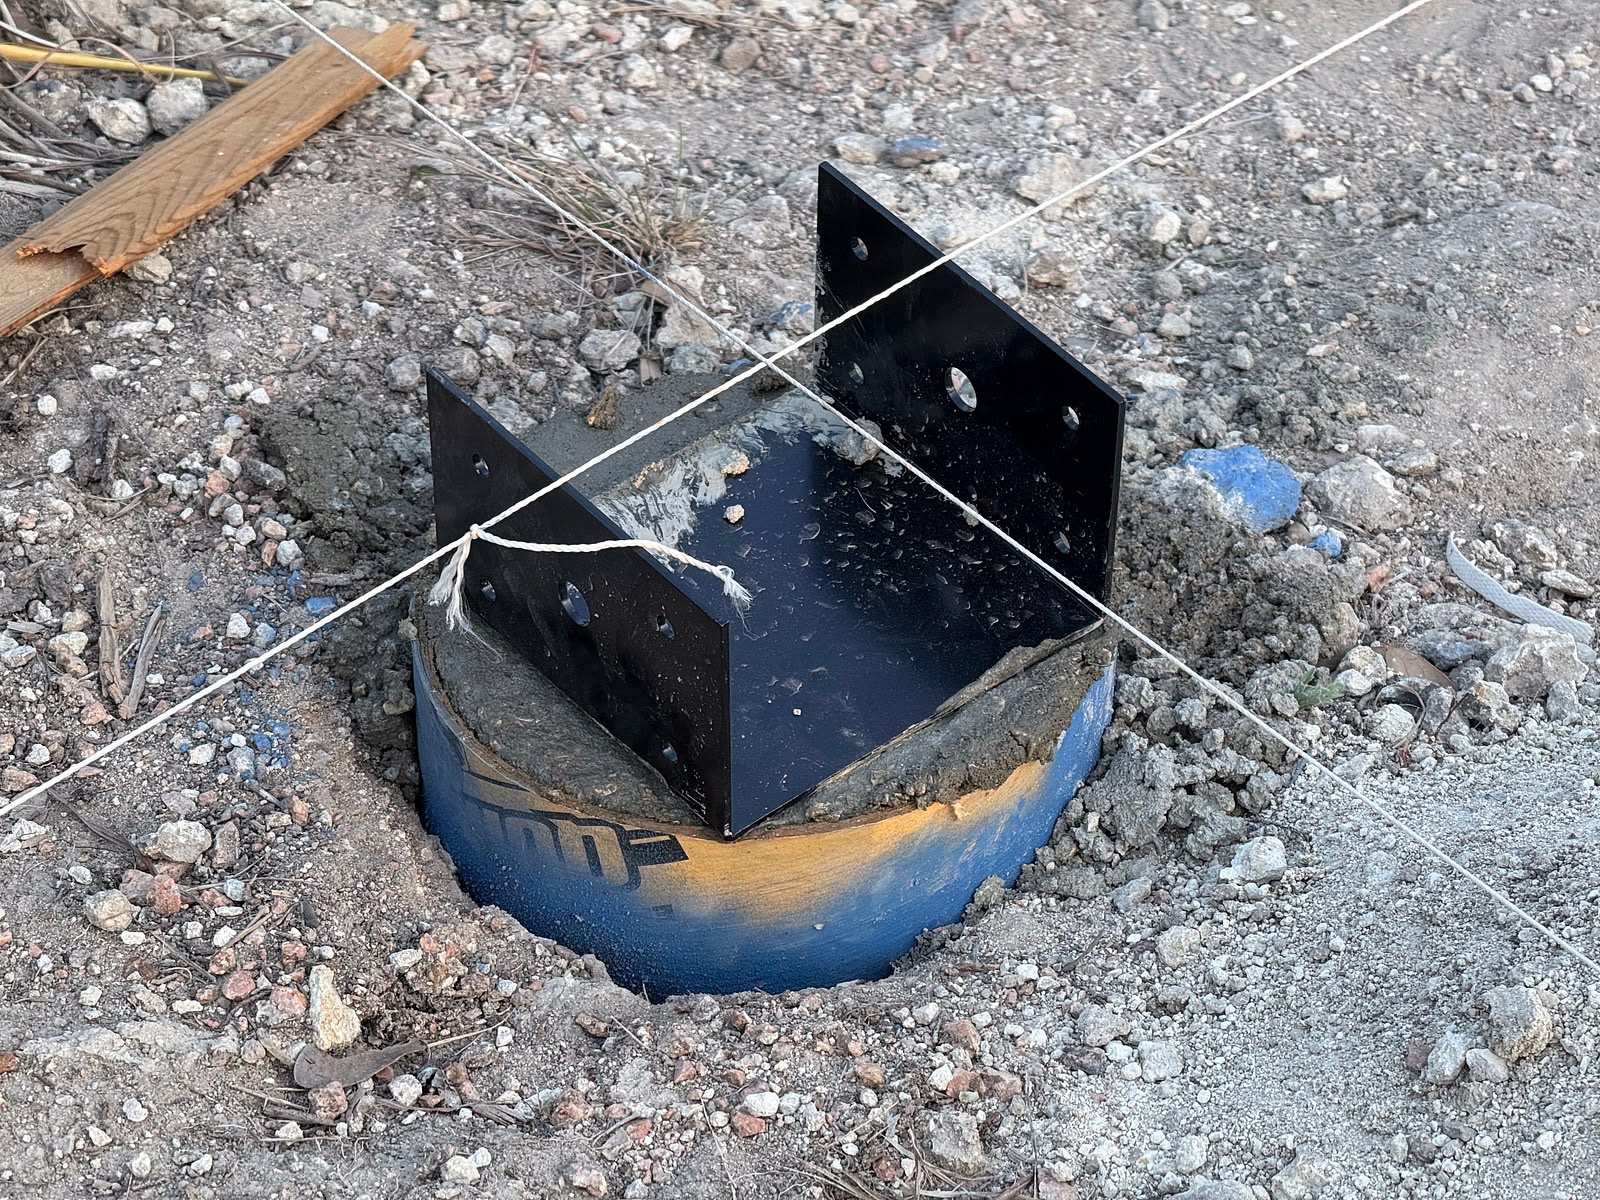
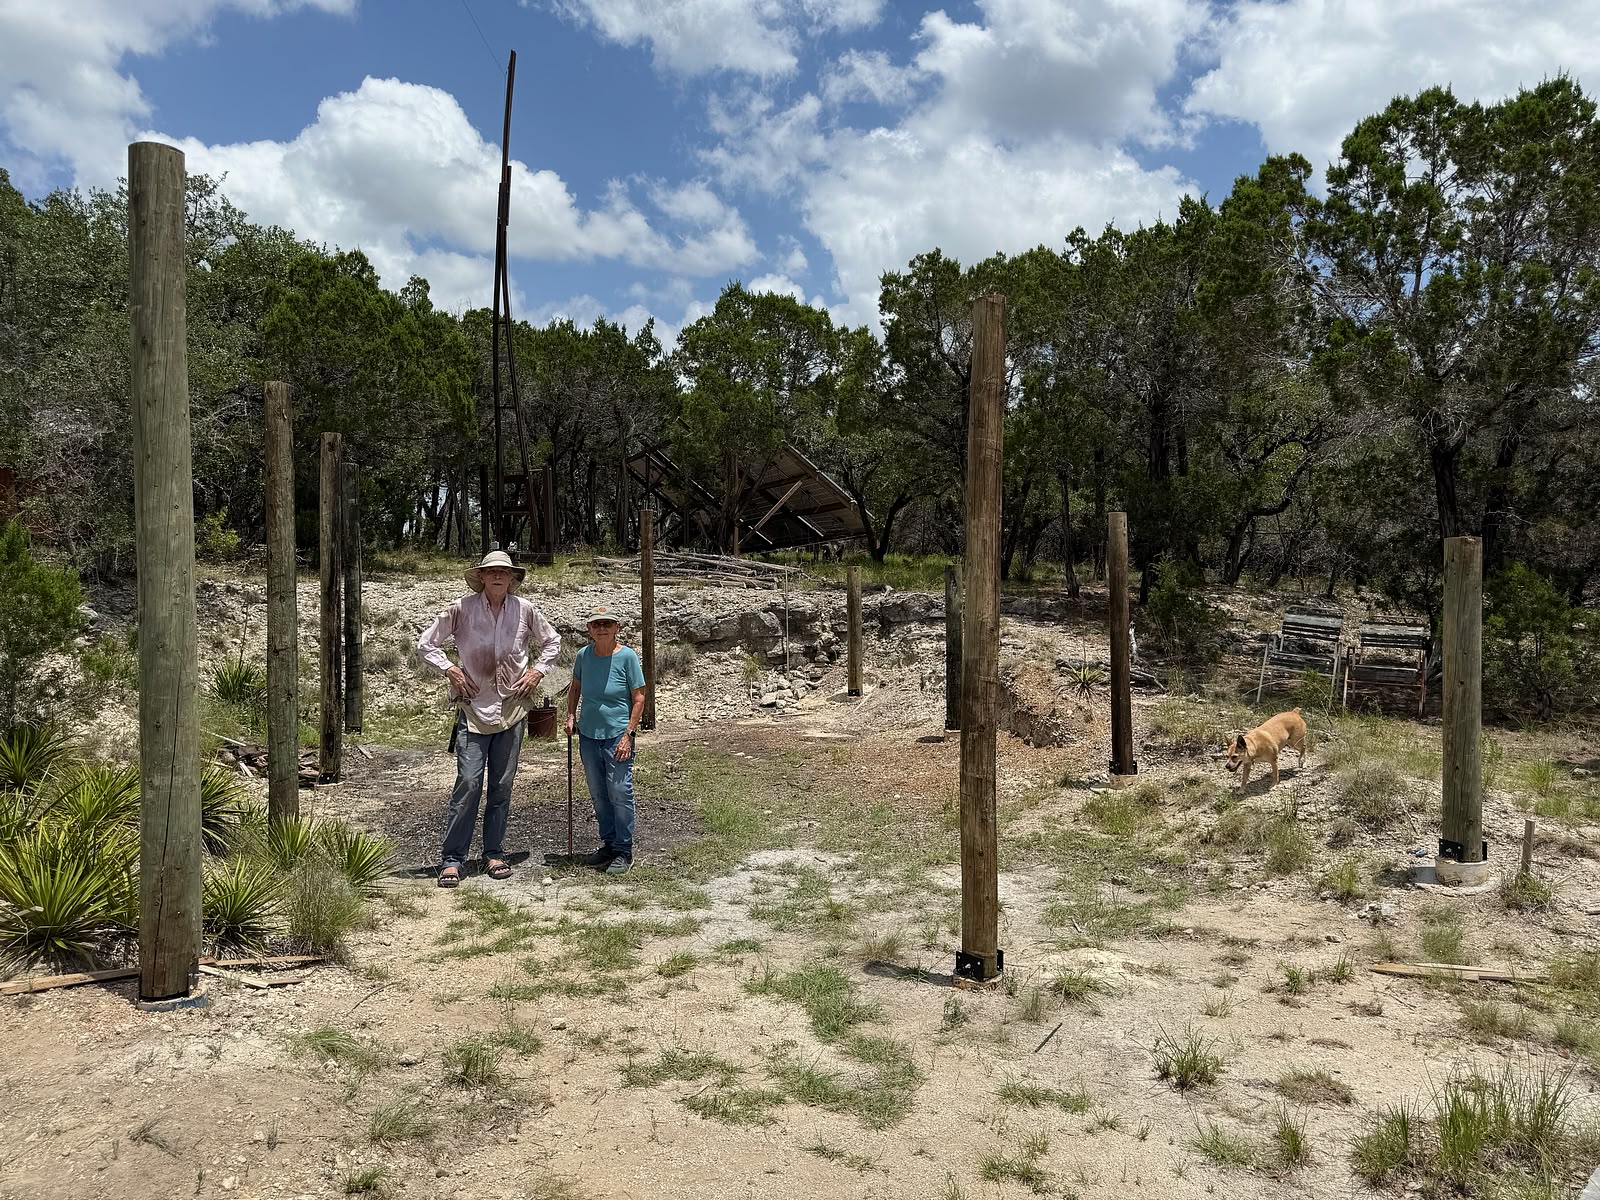
• Footings – Traditional concrete footings are difficult here due to shallow soil over solid rock, so the structure was effectively anchored directly into bedrock. An 18-inch deep hole in the relatively-soft caliche, was followed by three splayed holes drilled directly into the solid rock. Rebar was then epoxied into the deeper holes, followed by a concrete cap to link the rebar with the post mounting bracket. A total of 10 footings would support the entire building.

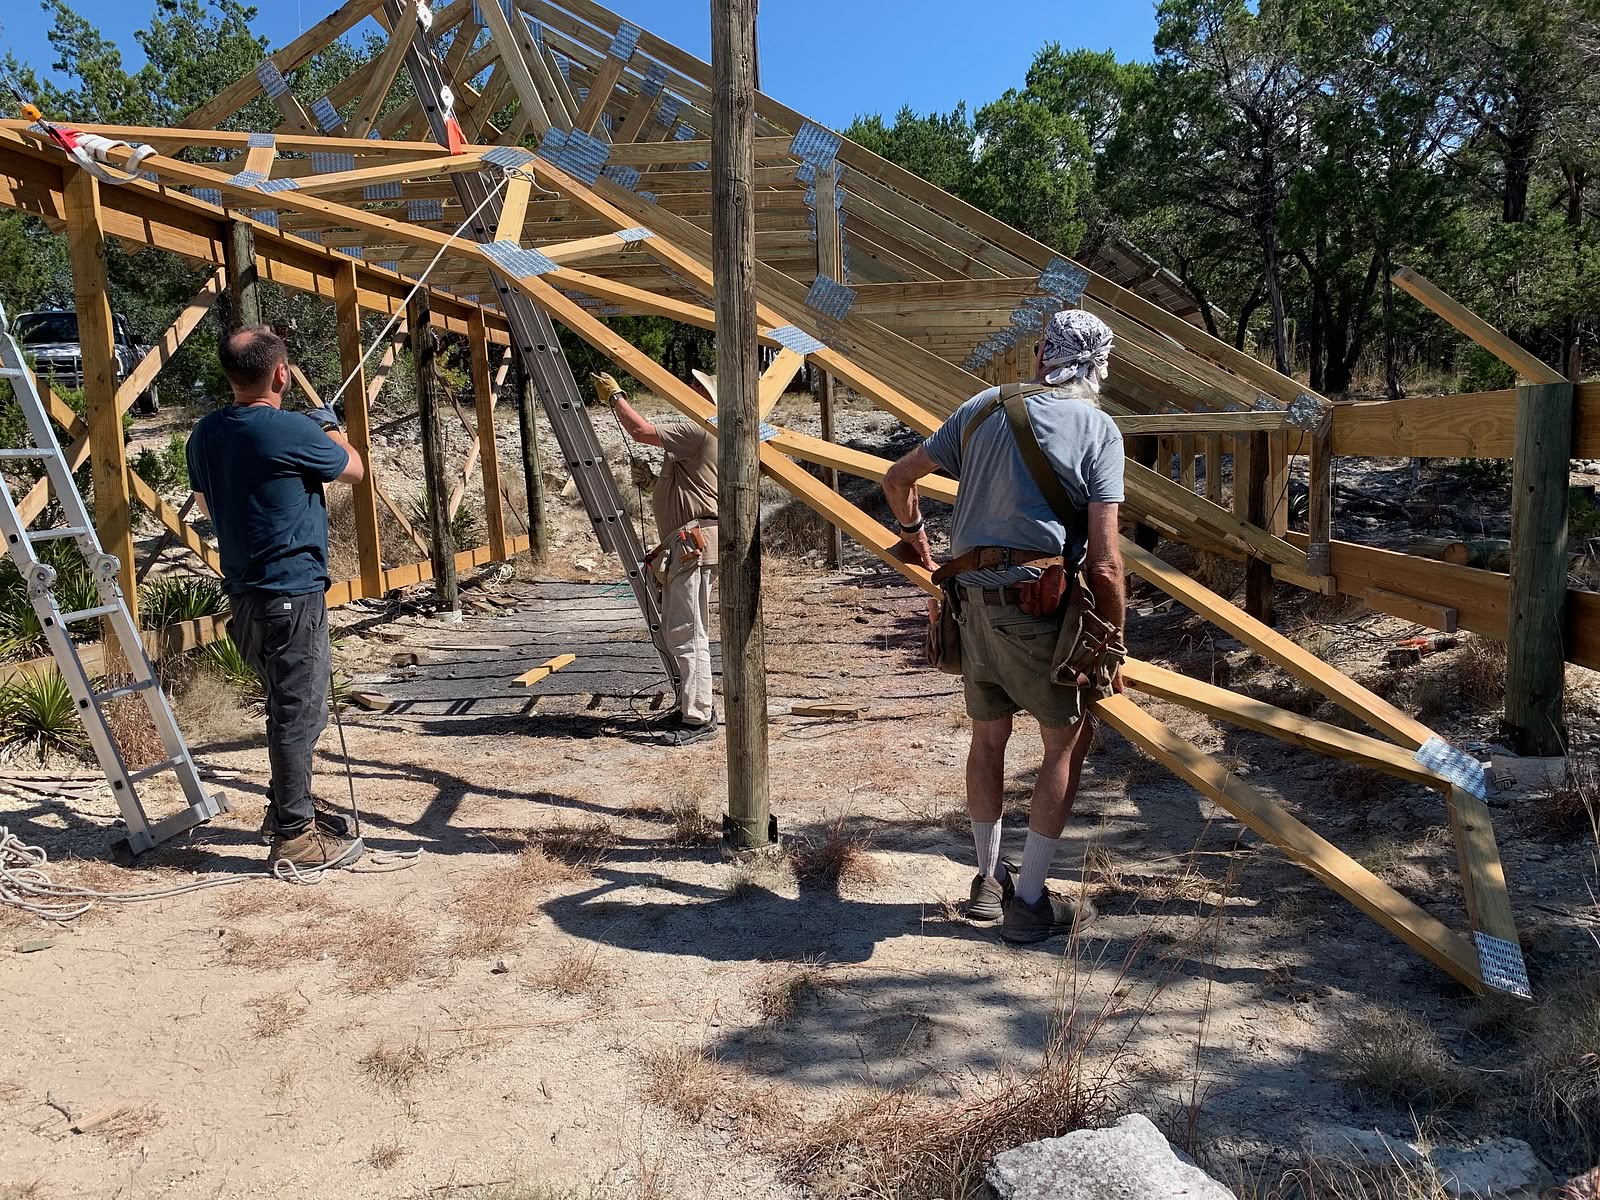
• Custom trusses – Joe decided that an asymmetric design with two unequal roof sections would be best. One side, angled to capture the best average sun year round, was sized to support the 24 panels, almost 500 square feet of solar array. The other side, with a smaller roof, would cover the remaining space needed for vehicle storage. The asymmetric design allowed solar performance and vehicle storage to coexist in a single structure.
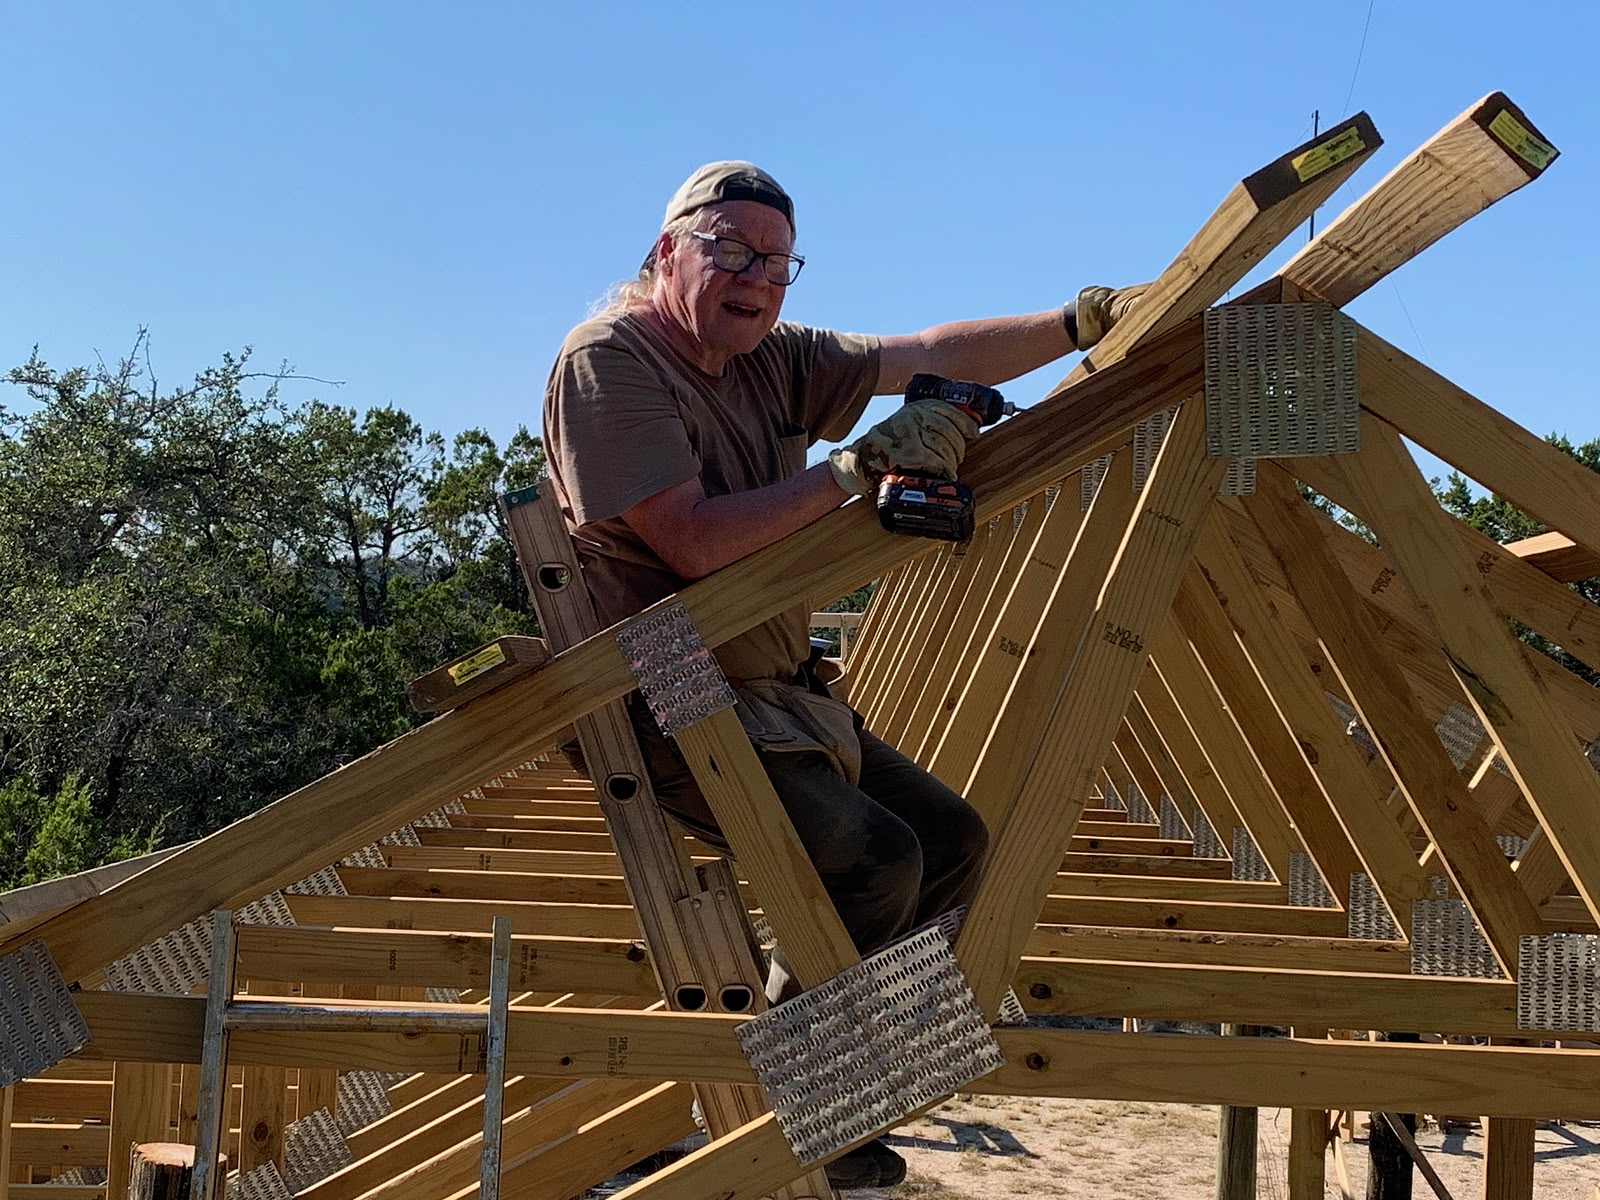
Since this design was very custom, we would have to build the 14 trusses ourselves. Joe is an expert systematizer, and showed me how a custom work bench would be used for assembling each truss, using steel truss plates. This process accounted for the majority of the build effort.
• Material Decisions – Originally, I wasn’t thinking about a covered building. Just some metal roofing over those parts of the building where the EV would be stored. The side carrying the solar panels would attach directly to the truss framing. Eventually, Joe convinced me to put metal roofing on the entire building so that it could be fully enclosed at a later date. I could also collect rainwater.
Finished system look
We could have framed the entire structure with SPF lumber, but since I wasn’t sure I would ever enclose the space, I decided to use treated lumber for weather resistance. There were some additional costs for treated lumber, but by far, the bigger impact was the difficulty in working with it. It took several weeks to complete all the framing and trusses. Treated lumber improved durability but significantly increased construction difficulty as it dried in the Texas sun.
• Hurricane hardware – Because the structure may eventually become enclosed, and has a big steel roof (read: sail), I decided that hurricane hardware would be wise for maximum wind protection. While hurricanes and tornadoes are rare here, straight-line winds of 80–100 MPH are not unusual.
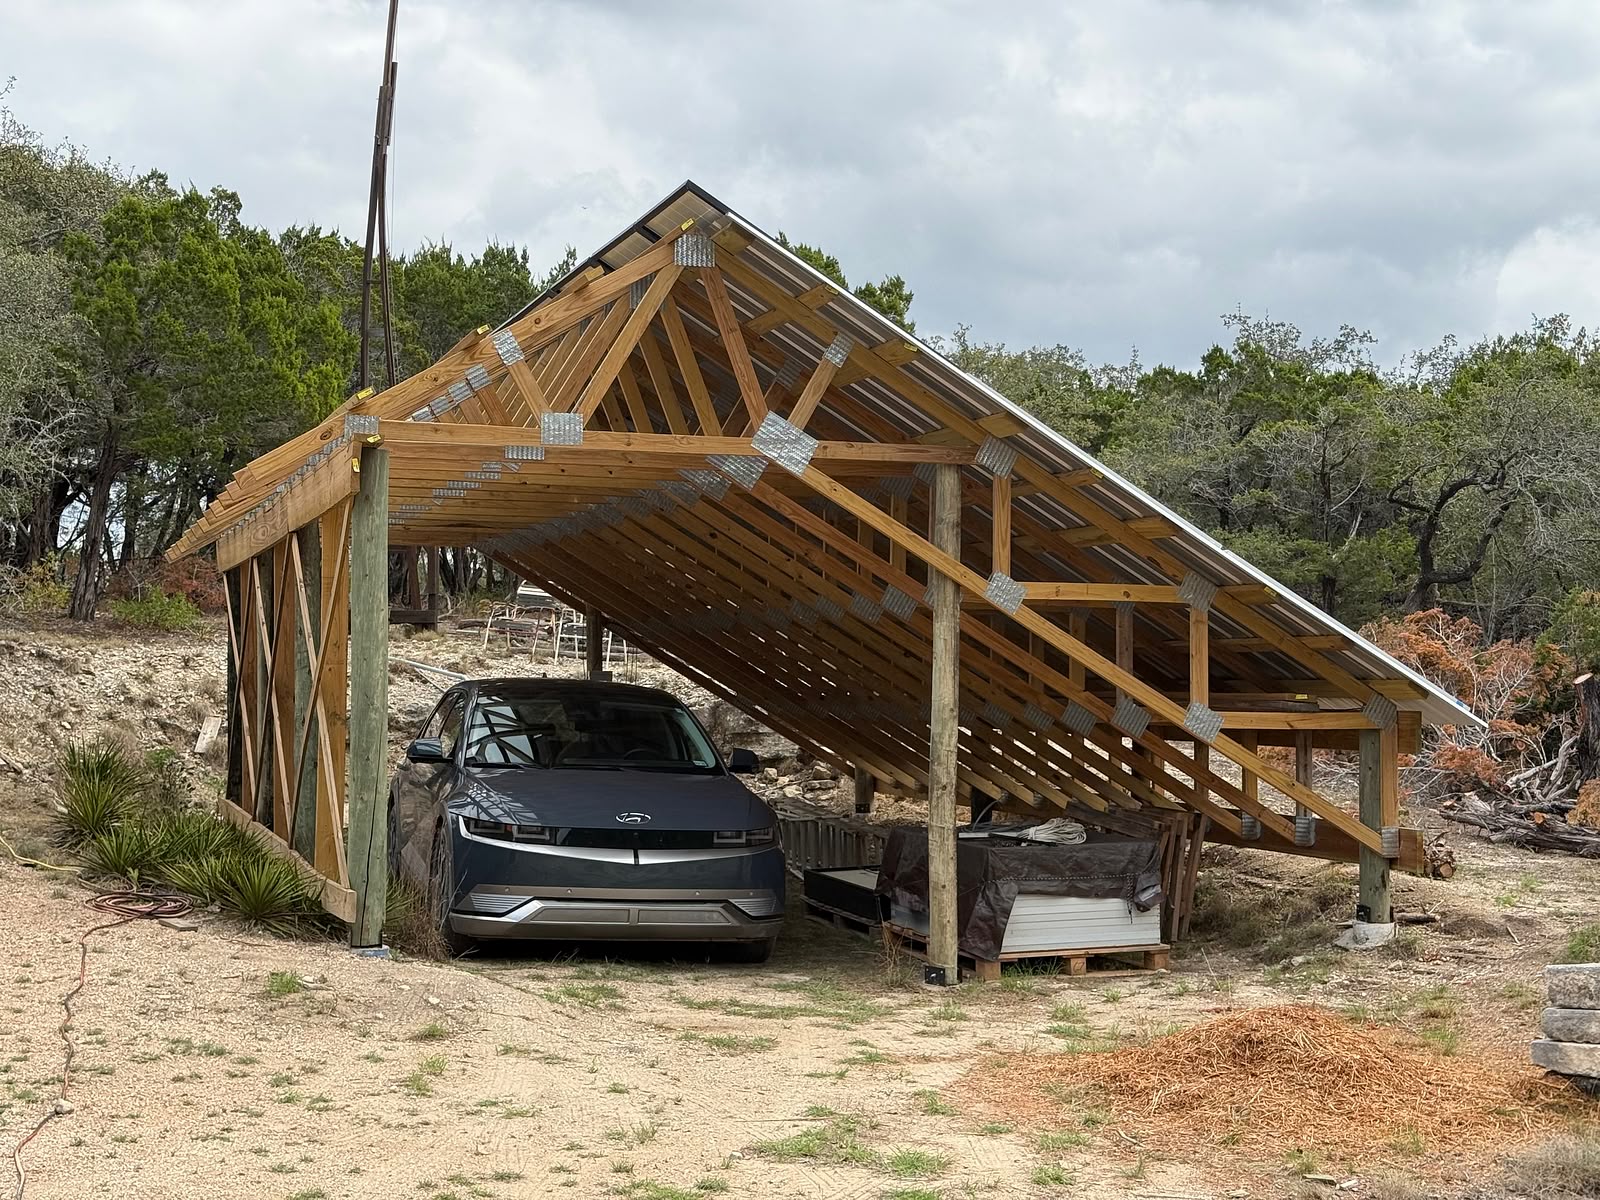
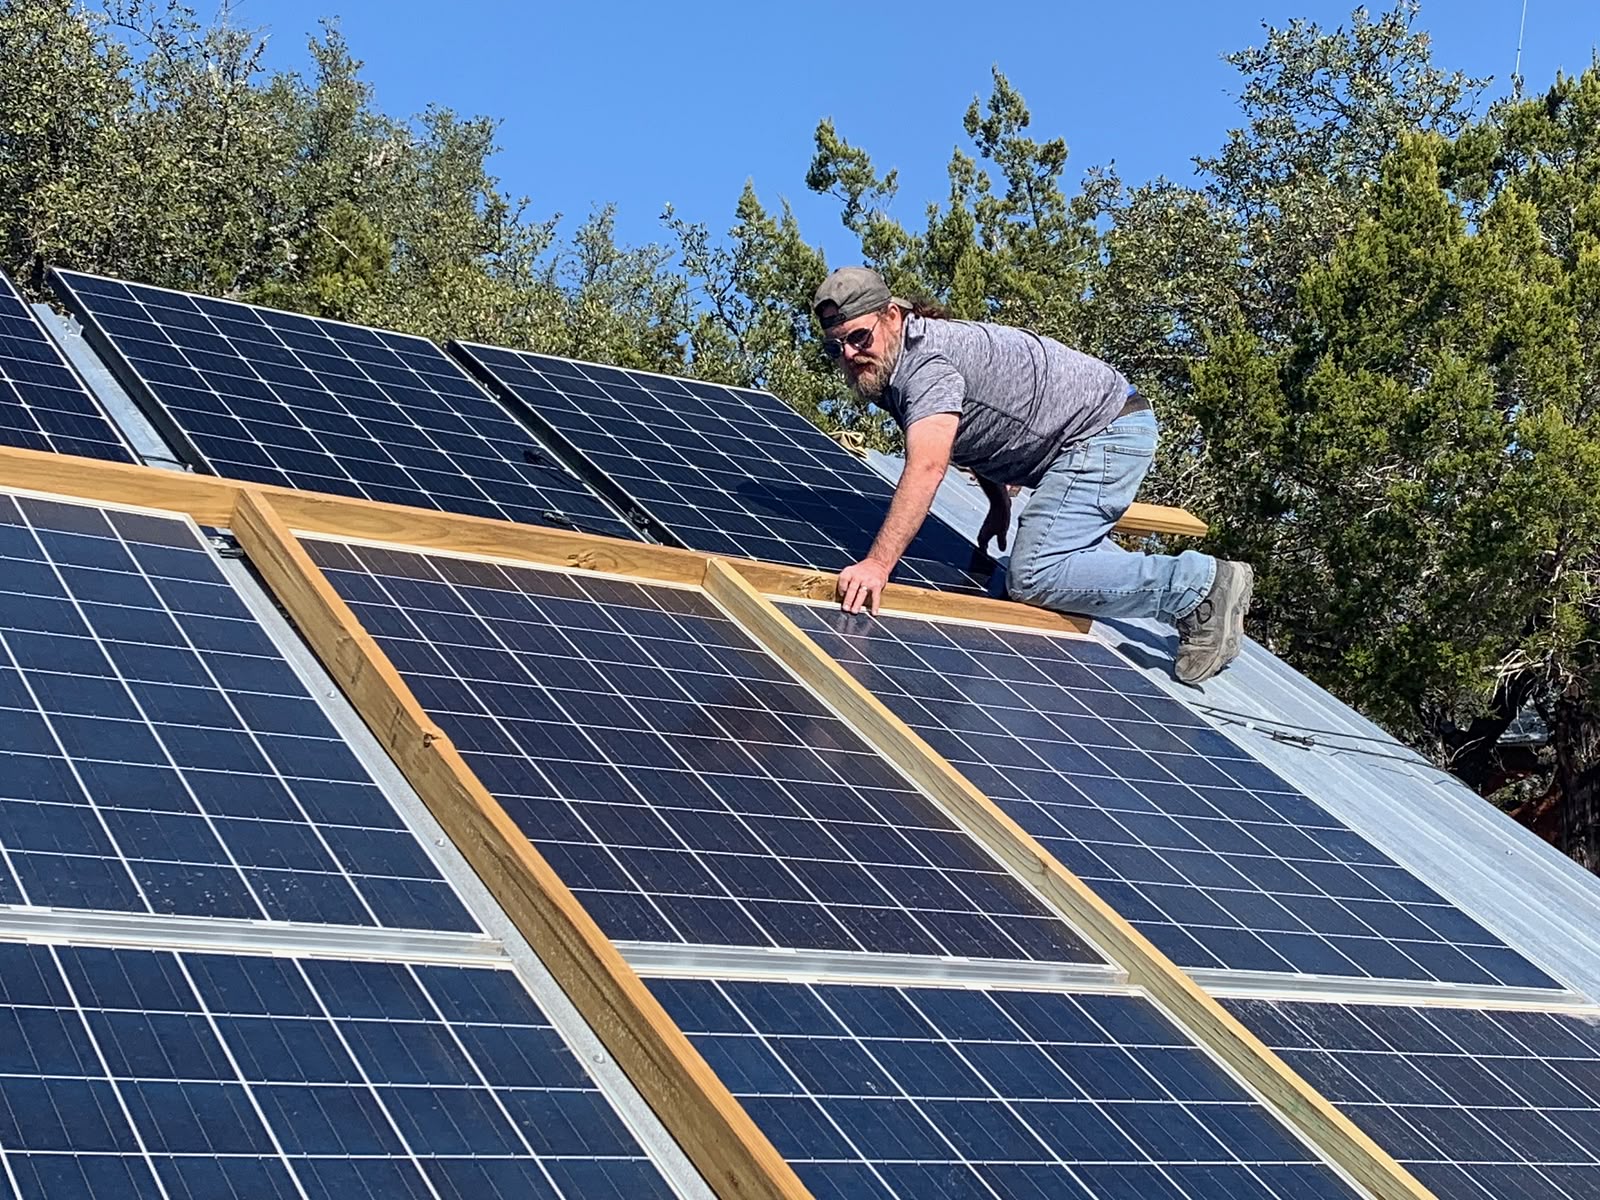
The finished garage looks like an open-frame pole barn with an asymmetric roofline. The larger roof section supports the solar array, while the smaller section shelters the EV. Metal roofing protects the structure today, and the building could easily be enclosed later if additional workspace is needed.
What changed as a result
With the completion of the Solar Garage and the addition of 24 more solar panels, we have met the original design goals. Combined, the two arrays have produced a peak power of 10,500 watts. That’s enough to charge the Ioniq5 at a level-2 rate (7500 watts) and run some heating and cooling in the shop as well. The garage fills the gaping hole left for the original contractor, giving a more finished look to the overall property.
I plan to add the remaining metal roofing to the smaller roof before we reach peak thunderstorm season, making the garage an ample shelter for the EV. Although not part of the original plan, it wouldn’t be hard to add rainwater collection to the project. The additional area of the roof, almost 750 square feet, could produce nearly 500 gallons per inch of rain. Substantial enough to make it worth the effort of adding gutters and piping.
• Level 2 EV charging
• Property improvement
• Weather protection
• Future rainwater capture
The garage solved the structural problem, and apart from a few finishing touches, is now producing power for our EV. We worked right up to the first cold weather (and some rare sleet!), I’ll complete the remaining roofing and final bracing when the weather warms up.
Solar Resilience Project Series
Follow the evolution of the Roy Creek Ranch solar system:
Phase 1 — Foundational Systems
- Solar Power for the Amateur Radio Station (2015)
- Solar Powered Rainwater Project (2017)
- 2 kW Shop Solar System (2019)
- Build a Handy 12-Volt Solar Generator with LiFePo4 Batteries (2023)
Phase 2 — Expansion & System Upgrades
- Solar Power System Upgrade (2022)
- The Really Big Lithium Battery (2023)
- Solar EV Charging — Ioniq 5 (2024)
- Inverter Upgrade for EV Charging (2025)
- Solar Garage EV Charging (2026)