Build A Great VPO — Part 2 : Salvage and Move
How to Build a Great Virtual Pipe Organ (VPO)
Salvaging an old electronic organ from the 1960’s
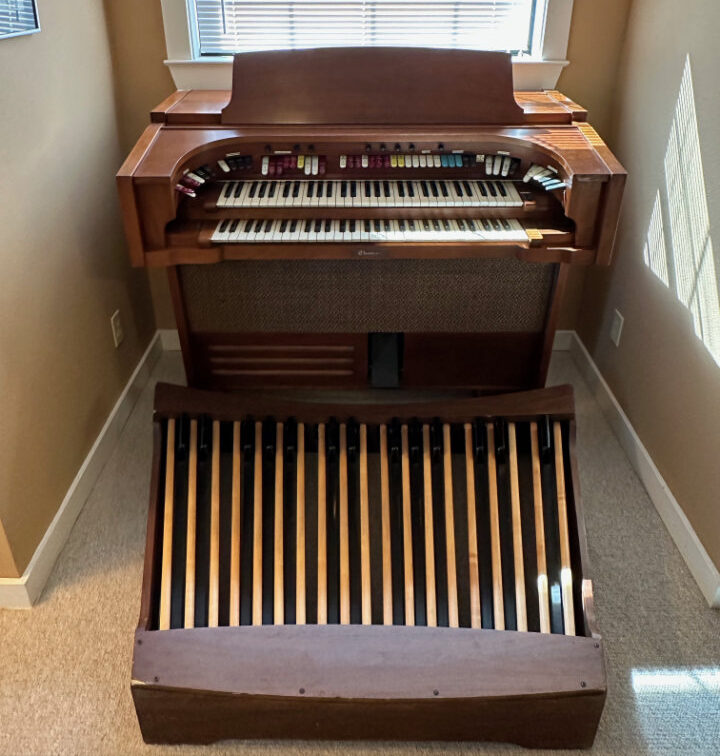
In a previous post, we talked about converting a Thomas Transistor Organ into a great Virtual Pipe Organ (VPO). This early 1960’s era electronic organ has good bones, but is not worth restoring to its original condition. We can salvage some key components however. In this post, we begin with disassembly. Besides removing the parts we’re not going to use, it will also make the cabinet lighter. This is important since the organ must move to the second floor our home to make way for a remodel.
An early synthesized, solid state organ
But first, what’s here? The Thomas Transistor Organ was one of the earliest [mostly] solid state home organs. It consists of a series of oscillators, one for each semitone, that produce harmonically-rich sounds across 5 octaves. By way of clever switching, those tones are routed through various filters to resemble harmonically complex sounds like Diapason or Saxophone and purer tones like the flute — a nearly sinusoidal waveform.
Solo Stops
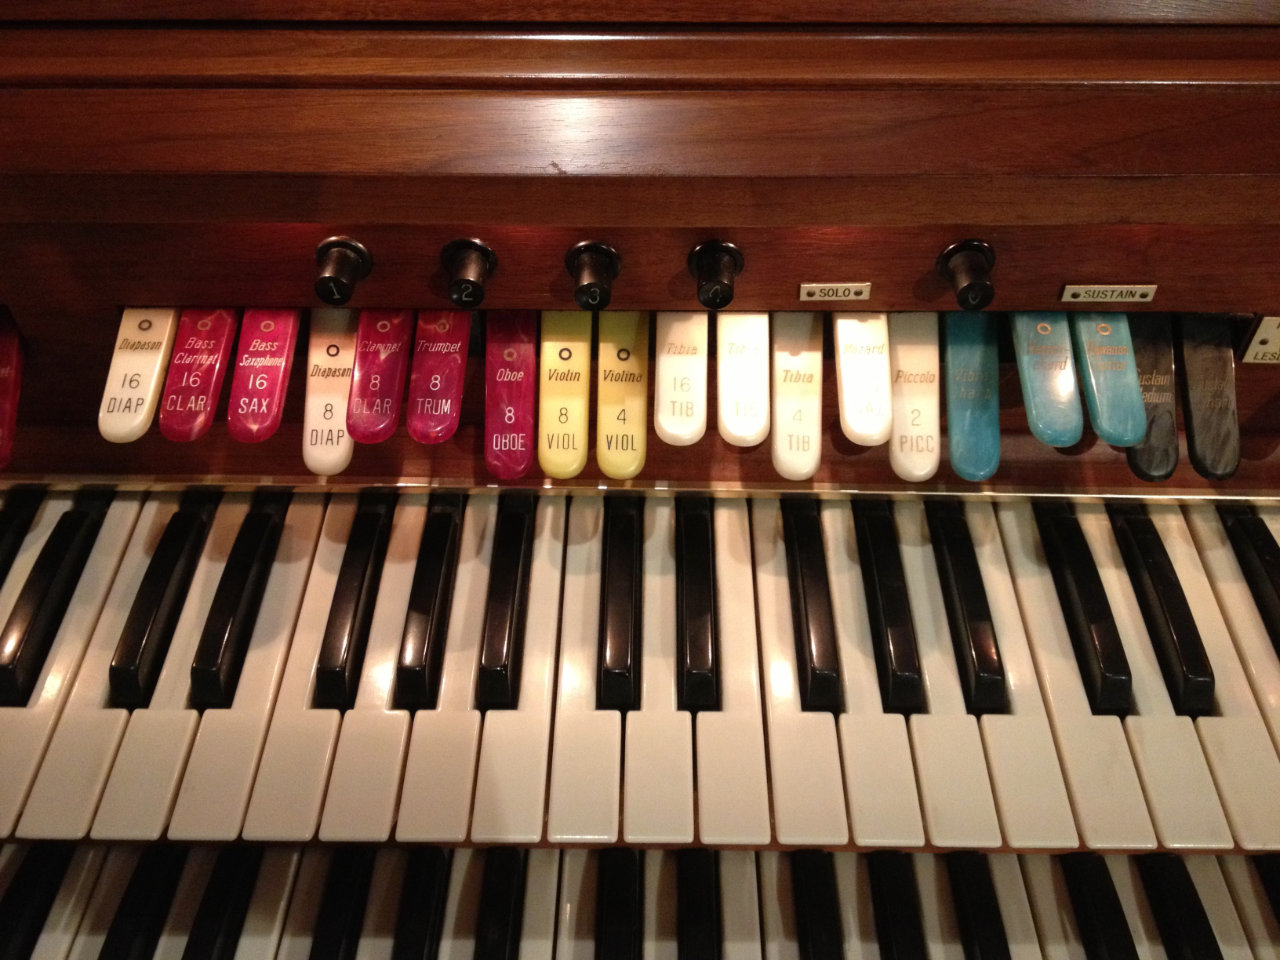
A variety of stops each have varying degrees of these harmonically rich waveforms and levels of filtering. Some stops are assigned to the upper or “Solo” manual while others are unique to the “Accompaniment” and “Pedal” manuals. In this way, simulations of classic pipe organ ranks are produced. Tuba, Diapason, French Horn, English Horn, Sax, Clarinet, Trumpet, Oboe, Violin, Flute and Piccolo are listed along the horseshoe-shaped stop rail. There are also a few novelty sounds popular from the 60’s like Vibraharp, Harpsichord, and Hawaiian Guitar.
While suggestive of these instruments, they sound about like what you would expect from an early electronic synthesizer. In effect, the Thomas Transistor organ was a subtractive synthesizer with stop tabs instead of knobs and patch cords. The “patches” were all hard-wired in. The player had some control over the “mixture” of those patches. It was impressive for it’s day, but pretty limited by today’s standards.
What are we keeping?
Whatever the sound generator lacked, the sound system made up for it. Two vacuum tube-based audio amplifiers, 20 and 40 watt, drove two large speakers and a Leslie system. The 15 and 12-inch speakers were like those used in guitar amps of today. On top of that, a real Leslie speaker cabinet was included. Featuring another 12-inch speaker, there is a motor-driven rotating element that could be turned on and off. The sound of that rotating speaker as it changes speed defines the characteristic Leslie sound — still popular today.
Over 50 tabs on the stop rail
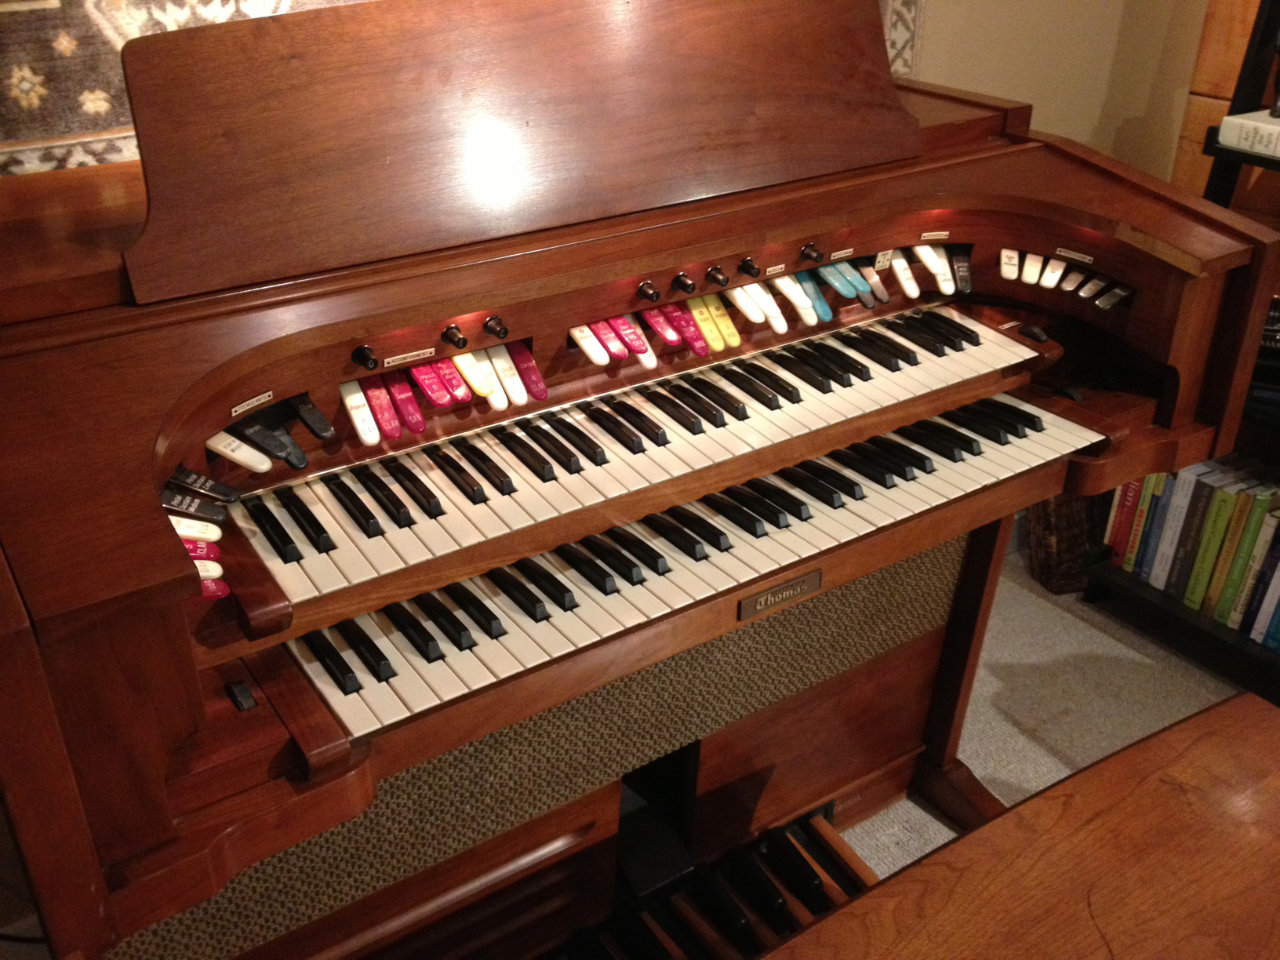
The horseshoe-shaped stop rail is useful too. With over fifty tabs, it can be repurposed to access the stops in the virtual pipe organ (VPO) software while still being visually authentic. There is even a mechanical “piston” system that can be used to return to one of four presets or registrations as well as cancel an entire registration. This won’t be enough to cover all the sounds produced by the various sampled pipe organs, but it will still be helpful.
Probably the most important thing is the cabinet. As I’ve dreamed about building a VPO over the last few years, I kept getting stuck on building the cabinet. It was the most daunting part of the project. By using an existing cabinet, I will have a solid and recognizable instrument with correct physical placement of keyboards, stops, pistons and other organ features. I don’t plan to use the two-octave European-style pedals, but everything else about the cabinet should work. Also, it’s made of solid cherry and cherry-veneer wood. That alone is worth preserving.
Moving to the “Organ Loft”
We need space in the living room . . .
The Thomas organ has been in the living room for several years now. When I first brought it home, I had fun restoring its function and playing it. That lasted for a while, but I lost interest and got busy with other projects. We always intended to have a wood stove for winter use, and (as mentioned in an earlier post) there have been power outages in two of the last three winters. It’s time for a change. The organ has to make room for the wood stove.
Fortunately, I have always intended to build the VPO in the upstairs loft. The only question, how to get it there? Fully assembled, the organ weighs at least 250 lbs. Not only that, but turning the corner at the base of the stairs was going to be tight. No guarantee it would fit.
Disassembly
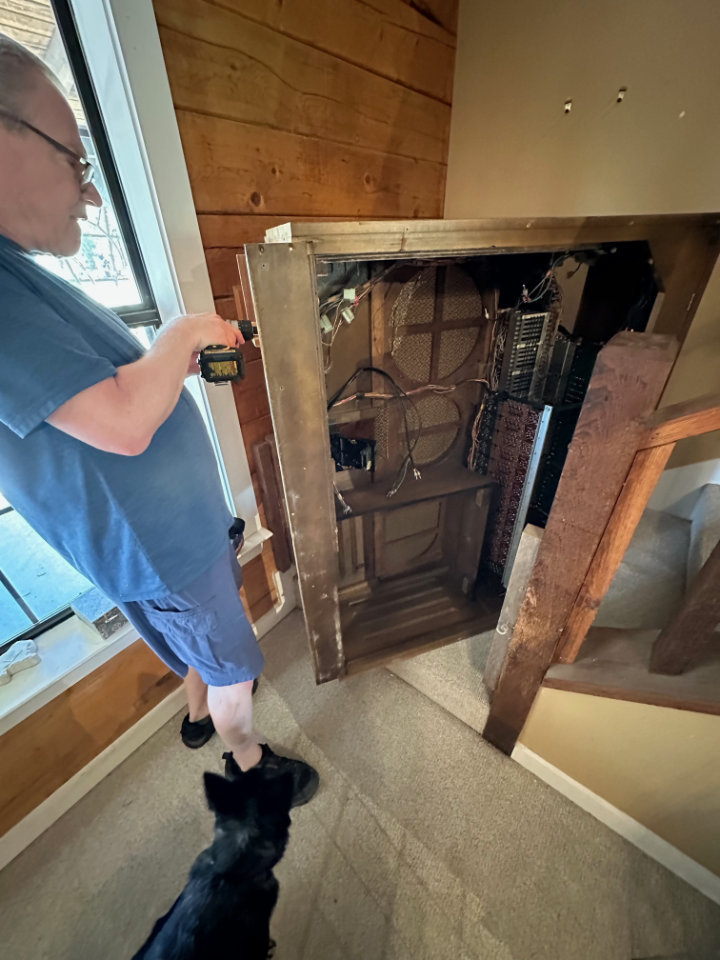
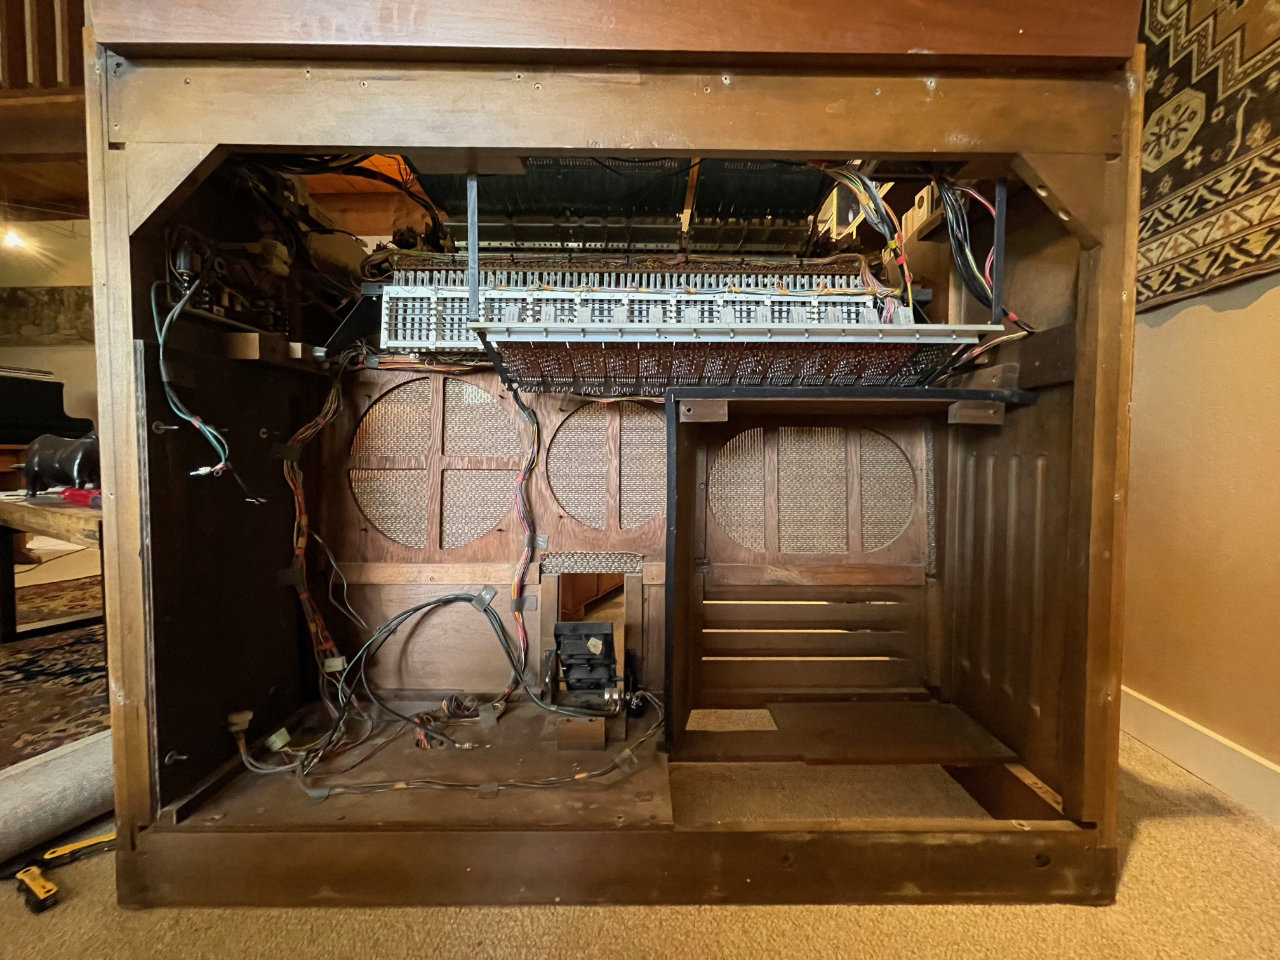
Back of organ
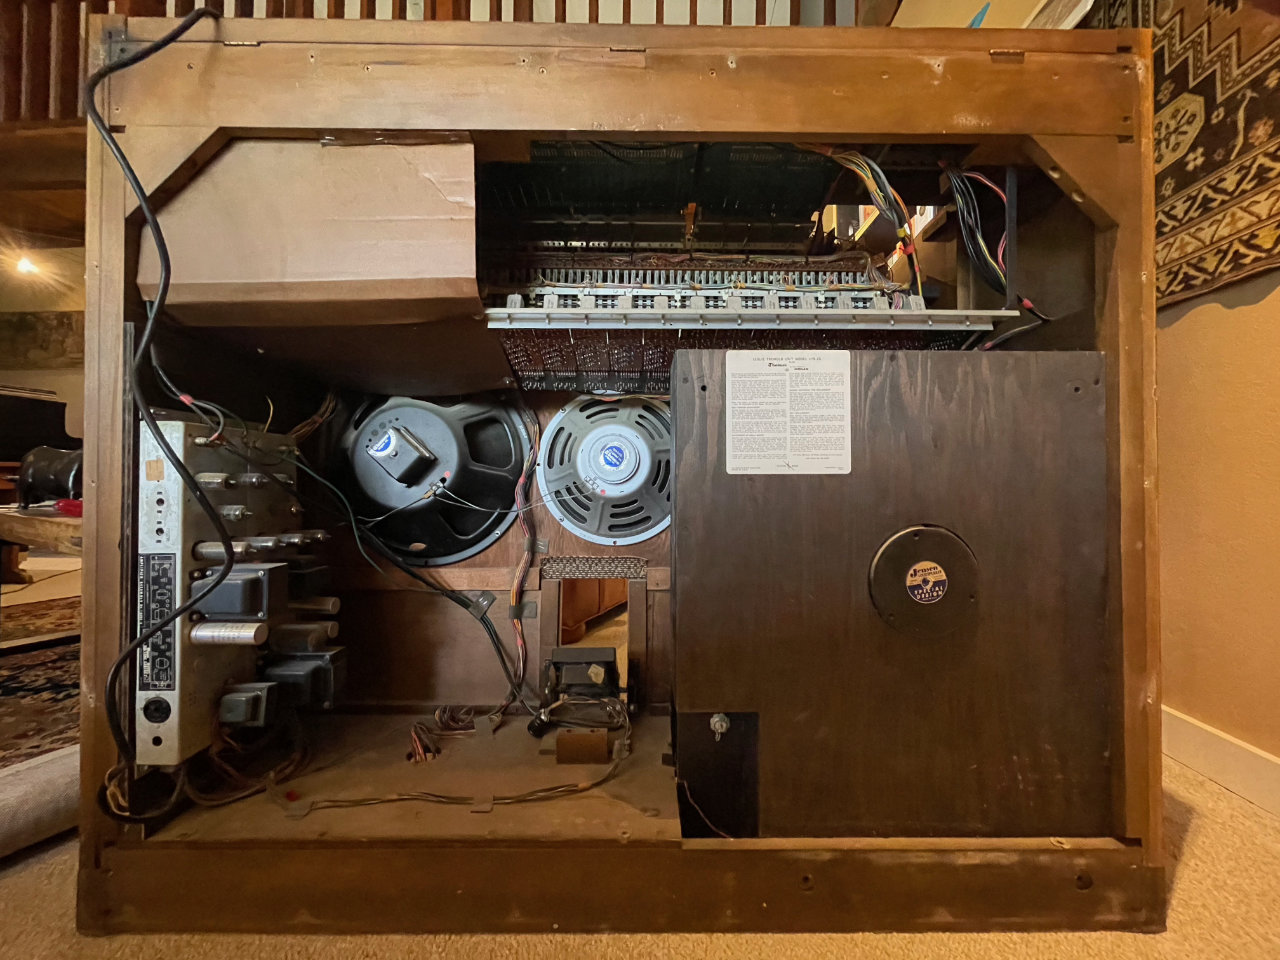
Since I had decided to gut much of the internal parts anyway, starting with that to lighten the load seemed reasonable. The pedals detached for moving, so I started there. Spinning the organ around, I could see a wooden piece covering the back. It was easily removed, and I could see the audio amps, Leslie cabinet, 12 and 15-inch speakers, tone generators, keyboards and the back of the stop rail. I had tried powering the organ earlier, but a loud pop followed by extremely loud hum through the speakers ended that test. Probably something had failed in the audio amps. Time for service.
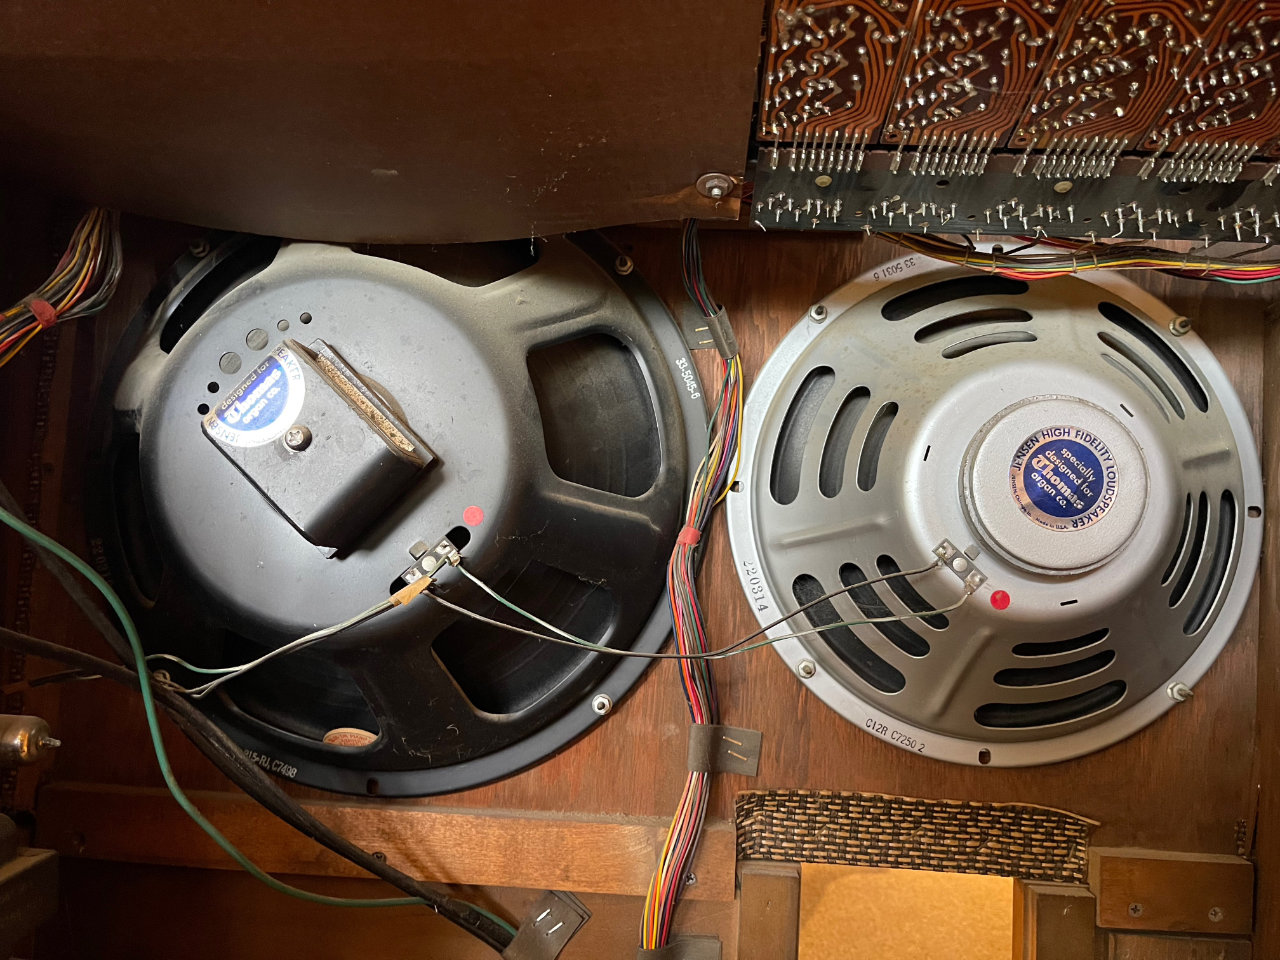
instrument speakers
Next were the 12 and 15-inch speakers. They appeared to be in perfect condition, with the Jensen stickers, and model numbers clearly visible. The code, 220314, stamped on the speaker frames, indicates a manufacture date of the 14th week of 1963. That was consistent with the history of the organ as I knew it. I had to unsolder a couple of wires, but after that, they came out easily.
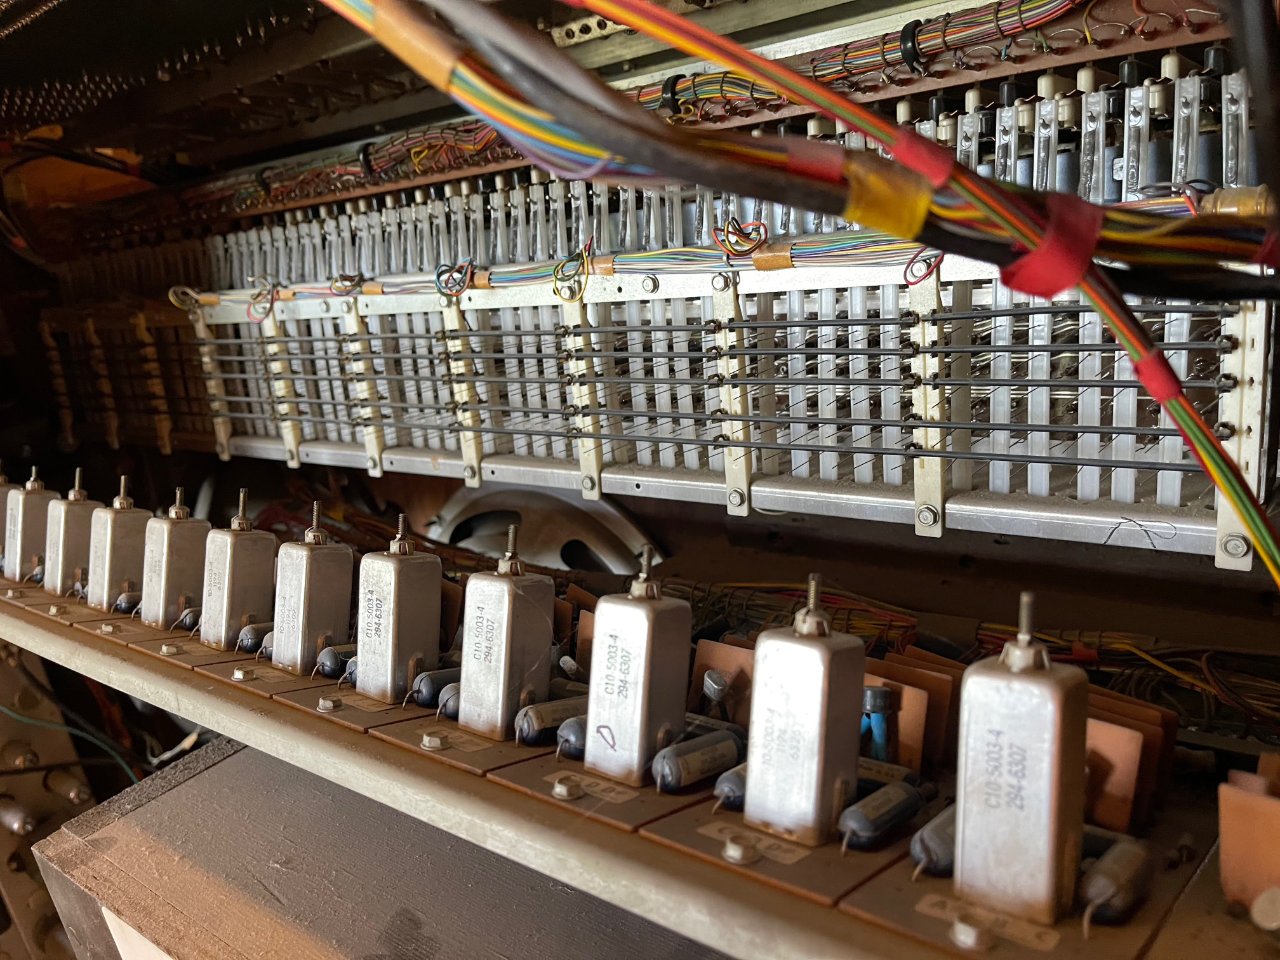
tone generators, solo manual
Above that, the tone generators and Solo keyboard were clearly visible. I wasn’t prepared to remove them just yet. They would come out in due time, since I wanted to remove them carefully. Perhaps someone else could use them in a different organ restoration. That left the next heavy part — the Leslie.
This was a bit trickier. It looks as though it’s meant to be removed, but there are quite a few attachment points. The main problem is getting it out past the bottom rail of the organ cabinet. In the end, I simply removed that rail. Out in the open, the back side of the Leslie reveals the motor-driven, spinning, speaker horn. It rotates several time per second — creating a live, moving sound that is so interesting. I also removed the cherrywood access panel to the horseshoe console. The organ was now at least 100 lbs lighter.


Moving
Turning the corner
I had a little help, and we stood the organ on its side on top of a furniture dolly. Getting it over to the stairs took just a minute or two. Since the dolly raised the organ by a few inches, it was pretty simple to slide the organ onto the landing. I was thinking we would lay it on its top and shove it up the stairs.
I had cleared everything from the landing and along the wall next to the stairs, but we still couldn’t quite turn the corner with the organ. Removing the cherrywood rails that served as feet and a couple of other pieces under the cabinet allowed us to just barely turn the organ. We could now lay it on its top.
So as to not damage either the top of the organ or the carpeting, I had laid two 1-by-4 boards covered in cardboard on the stairs for the organ to slide on. We were ready.
One, Two, Three, Shove!
Should be easy!?
We tried various positions to shove it up the stairs including pulling with a rope from above while shoving from the bottom. It wouldn’t budge. Its starting weight must have been much more than the 250 lbs mentioned in the organ specifications. A quick canvas of friends in the neighborhood who might be enlisted didn’t yield any helpers, but instead, a suggestion. How about winching it up with a come-along? One friend supplied the come-along, while another was near the home store and secured a stout screw eye. We broke for lunch and restore our resolve and wait for parts.
Plan “B”
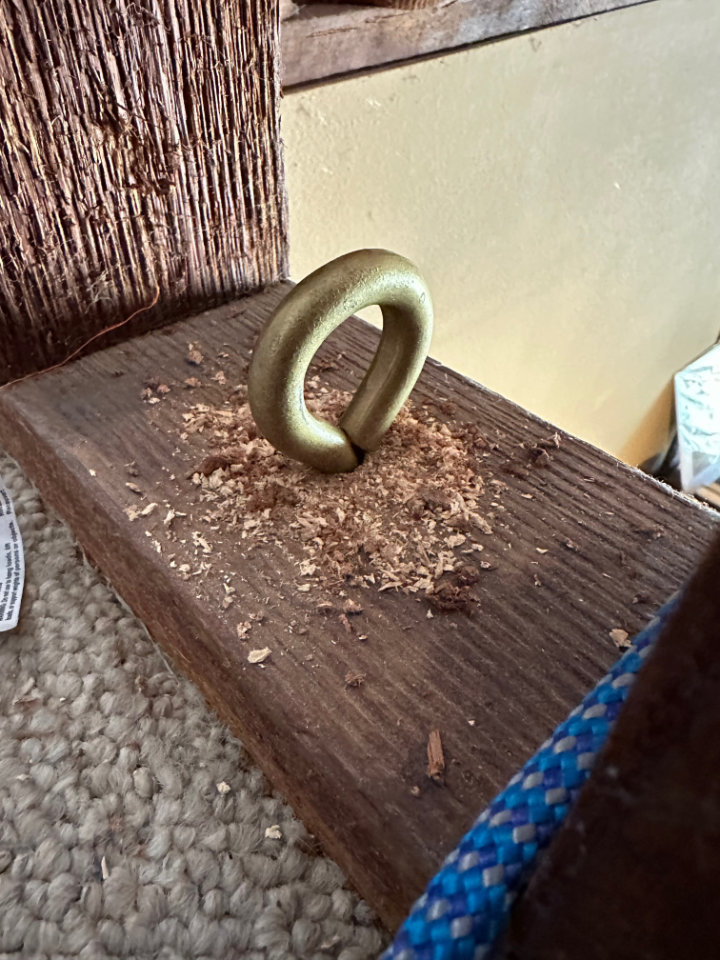
Winch anchor
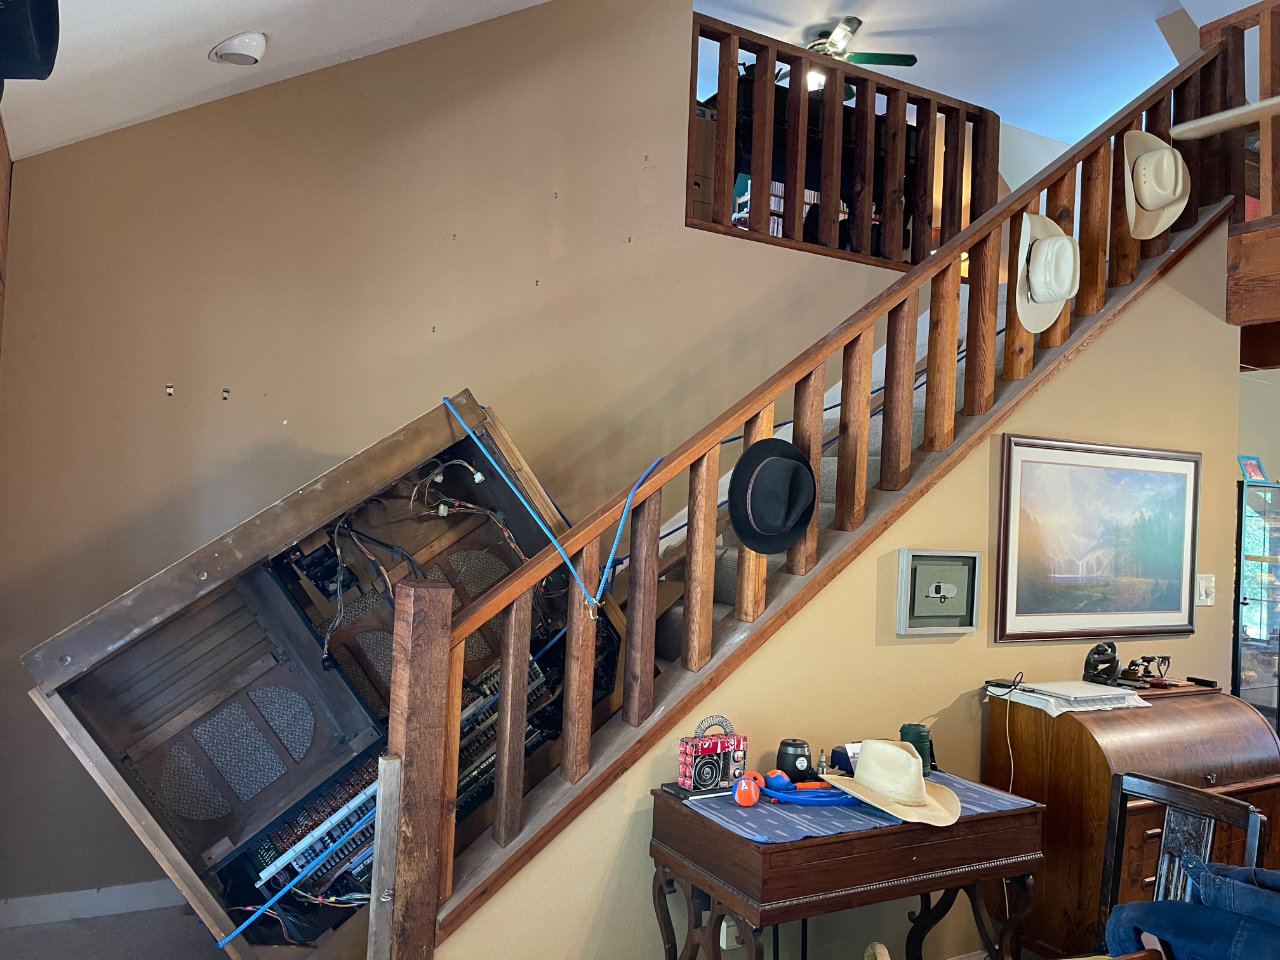
By the time we finished lunch, the winch and screw eye had arrived and we started again. I drilled an appropriate hole in the railing of the catwalk and screwed in the eye. A nylon cargo strap was wrapped around the organ and cinched up tight. One hook of the come-along winch was hooked to the cargo strap while the other grabbed the screw eye. I began winching.

Winching the Organ (movie)
While my helper steadied the organ from below, and I winched from above, the organ began to slowly travel up the stairs. It was over before we knew it — balanced on its top — upstairs in a few minutes. Archimedes was right: give me a lever, a fulcrum and place to stand, and I can move the world. Most remarkably, just the two of us were able to move a heavy organ up a full flight of stairs.
Next Steps to the VPO
With the organ partially reassembled and set up in the loft, I can begin converting the electronic organ into a control console for a Virtual Pipe Organ. One replacement keyboard is already here, and the organ cabinet height needs adjustment to mate properly with the full set of AGO pedals — also already here. The tube audio amplifier is on the bench for service so I’ll report on that next.
In no particular order, here are some of the other steps in the project:
- Repair audio amplifier
- Adjust organ cabinet height to mate with pedal set
- modify AGO pedal set to add MIDI output
- remove tone generator, and related electronics
- remove and replace manuals with MIDI-equipped keyboards
- create and mount rack space for MIDI combiner and multichannel sound interface
Follow along as I fulfill my long-held dream of creating a Virtual Pipe Organ and bringing that magnificent sound into our home!
Ready for moving