Building a Great Virtual Pipe Organ: Stop Tab MIDI Encoder
This post is an overview about building the Virtual Pipe Organ Stop Tab MIDI Encoder, and continuation of “Building a Great Virtual Pipe Organ: MIDI Encoders for Pedals and Stops.” For readers interested in the technical design and firmware details of these MIDI encoders, I’ve documented the development process in more depth on my technical blog at jimkerkhoff.com.
Designing the Stop Tab MIDI System
With the pedal encoder working well, it was time to turn to the next challenge: the stop tabs.
Unlike the pedals, which behave like a traditional keyboard, the stop tabs act more like switches. Each tab represents a single function — on or off — and many of them may be active at the same time. Encoding them required a slightly different approach, but the underlying philosophy remained the same: keep the hardware simple, robust, and serviceable. This stop tab MIDI encoder builds on the same architecture used for the pedalboard.
⸻
From Prototype to Production
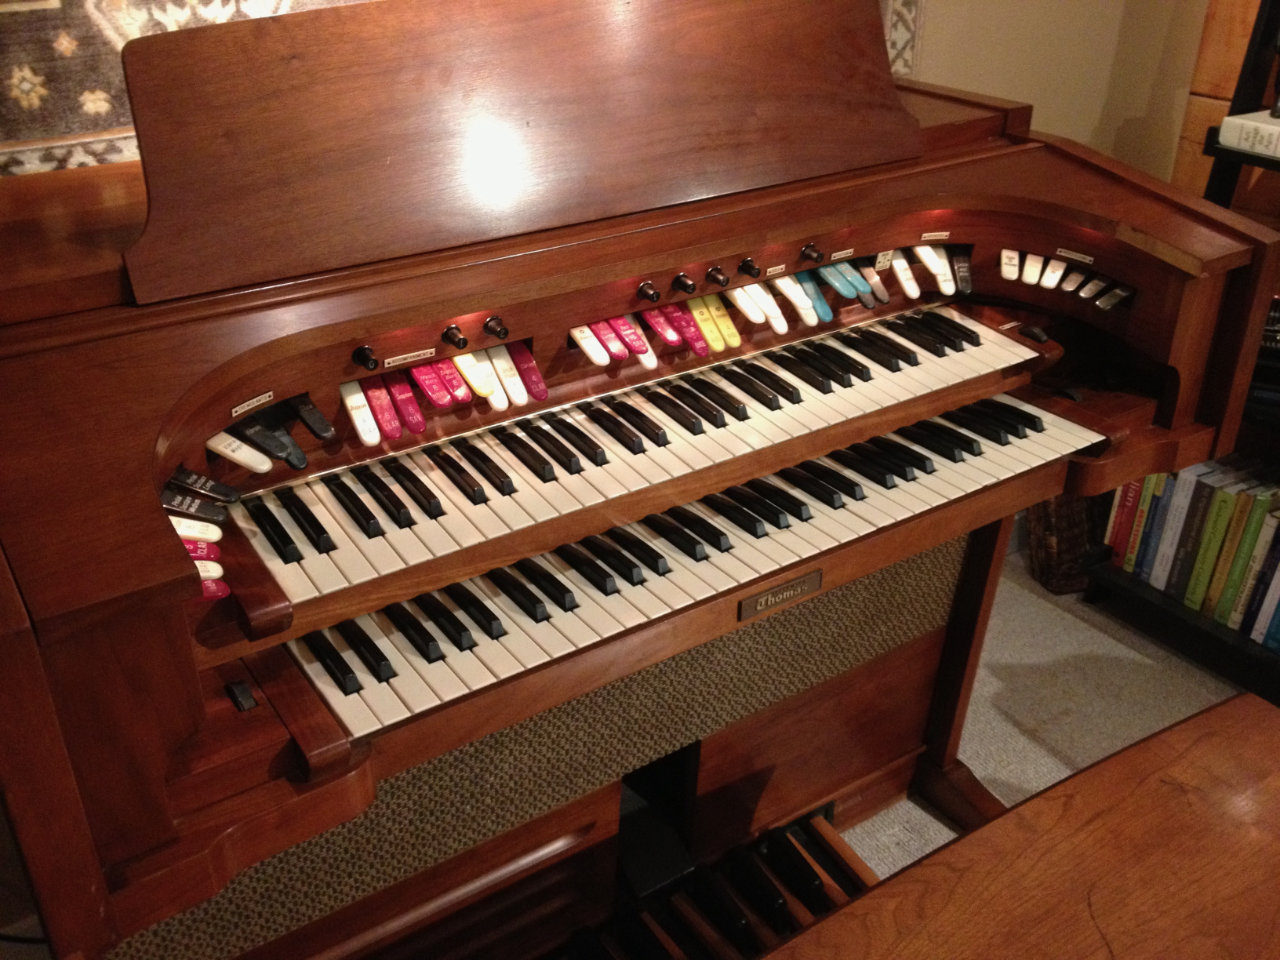
The organ console includes 48 stop tabs, arranged in a horseshoe around the top of the console. Each tab closes a simple switch when pressed. Electrically, this is about as straightforward as it gets — each tab either grounds a wire or it doesn’t.
But 48 inputs is a lot to manage cleanly.
Rather than hand-wiring another large prototyping board, I decided this was the right moment to move from “working prototype” to a proper printed circuit board (PCB). The pedal encoder had proven the concept; the stop tab encoder would become a more polished, production-ready version of the same idea.
At roughly the same time, I received an email from PCBWay, a firm specializing in PC board production and assembly, asking whether I might be interested in collaborating on an upcoming project. The timing couldn’t have been better. The stop tab encoder became that project.
⸻
Choosing the Architecture for the Virtual Pipe Organ Stop Tab MIDI Encoder
The final design uses:
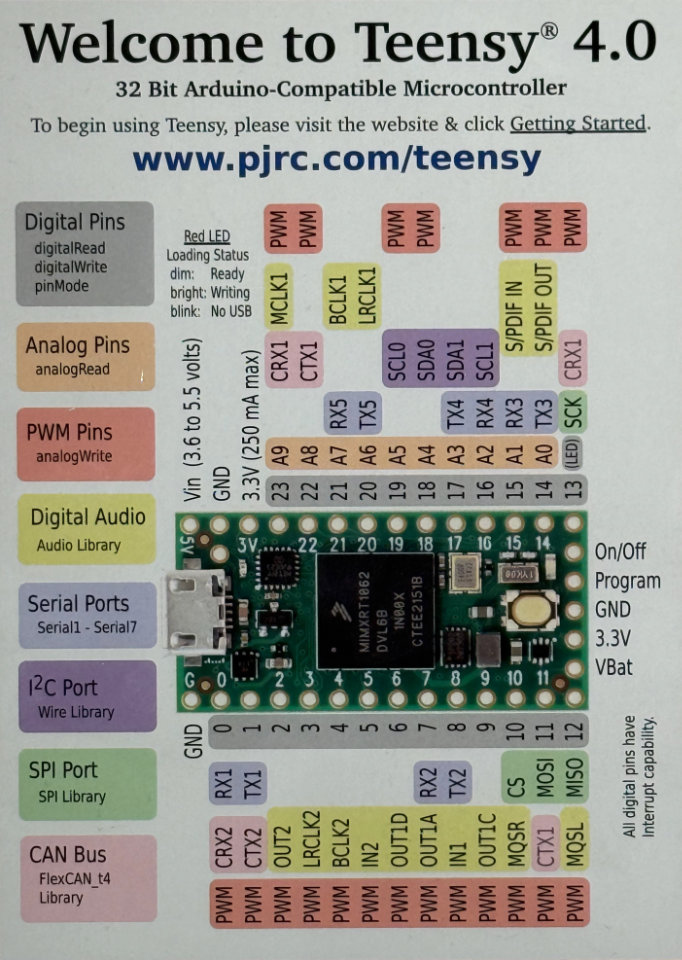
- One Teensy 4.0 as the USB MIDI controller
- Three MCP23017 GPIO expanders, providing 48 digital inputs
- I²C communication between the Teensy and the expanders
- Internal pull-up resistors on all inputs
- USB MIDI output directly from the Teensy to the host computer
Each stop tab connects to a single input pin. When a tab is pressed, it pulls that input to ground. The Teensy polls all inputs over I²C, detects state changes, and generates the appropriate MIDI messages.
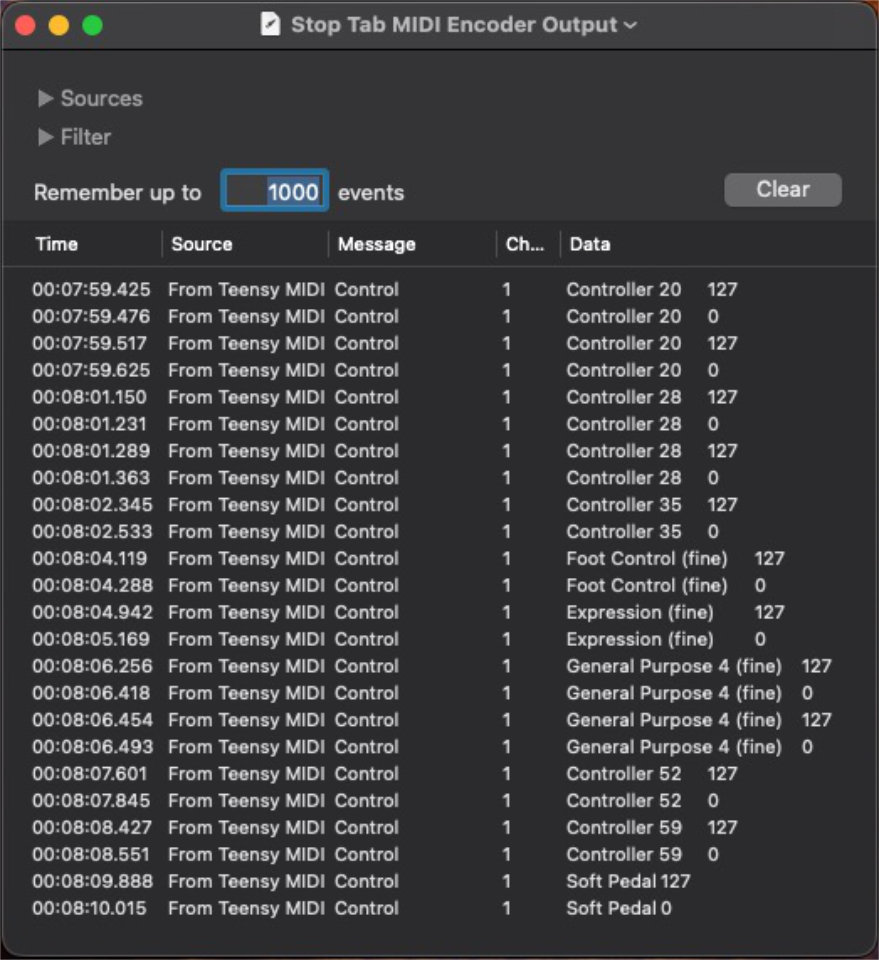
For stop tabs, MIDI Continuous Controller (CC) messages make more sense than note messages. Each tab is mapped to its own CC number:
- CC value 127 when the tab is activated
- CC value 0 when it is released
Virtual Pipe Organ software such as Hauptwerk can “learn” these messages easily, making the exact CC numbers largely irrelevant. Once learned, the Hauptwerk Stop Tabs will reflect the settings on the Console Stop Tabs.
⸻
Designing the Circuit Board
The PCB was designed using KiCad, which has matured significantly since the last time I used it. There was a learning curve — new workflows, new library management, new layout tools — but this is where modern tools (and some well-placed help from ChatGPT) really shine.
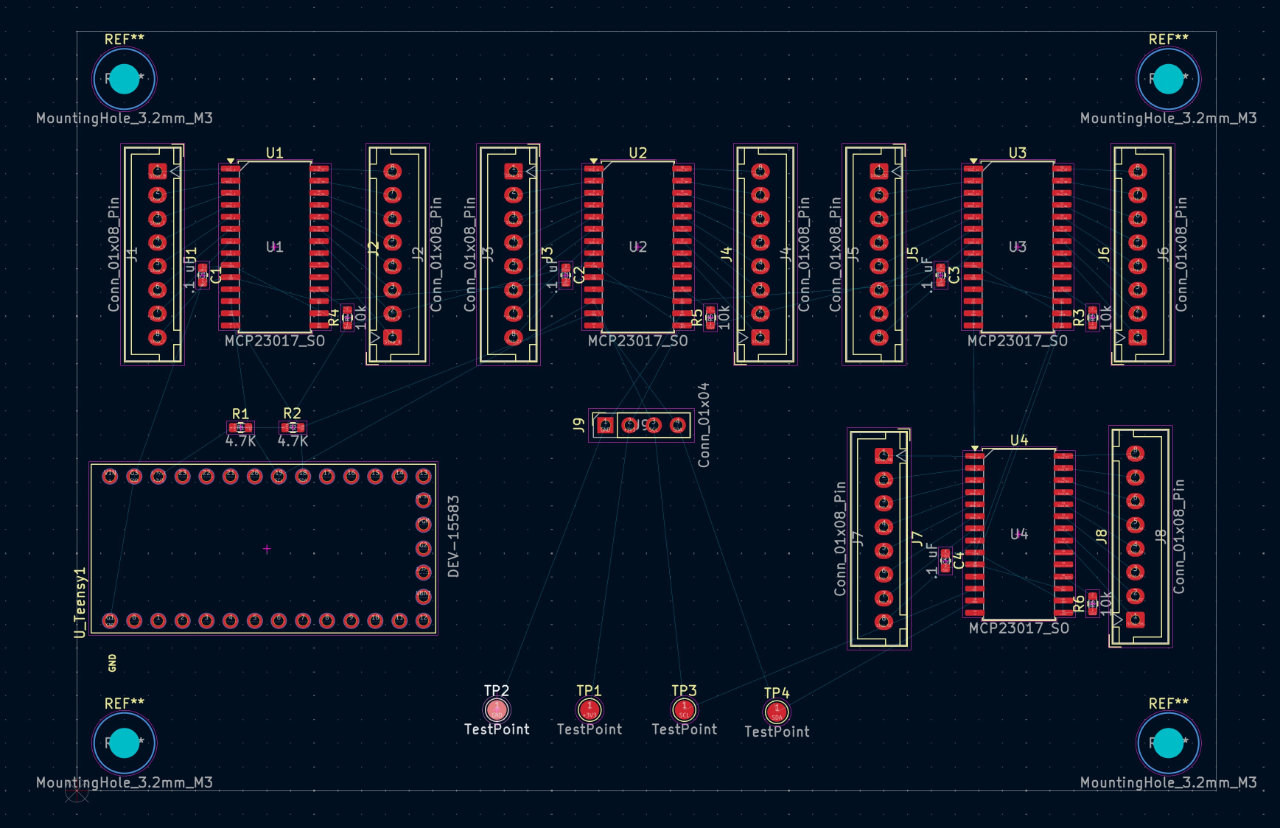
The board itself is intentionally conservative:
- Clear separation between digital logic and connectors
- Short, clean I²C traces
- Generous grounding
- Decoupling capacitors placed close to each IC
- Logical grouping of the 48 inputs using JST connectors
This is not a high-speed or high-power design, but good layout discipline still matters. The goal was reliability first, elegance second.
⸻
Assembly and Bring-Up
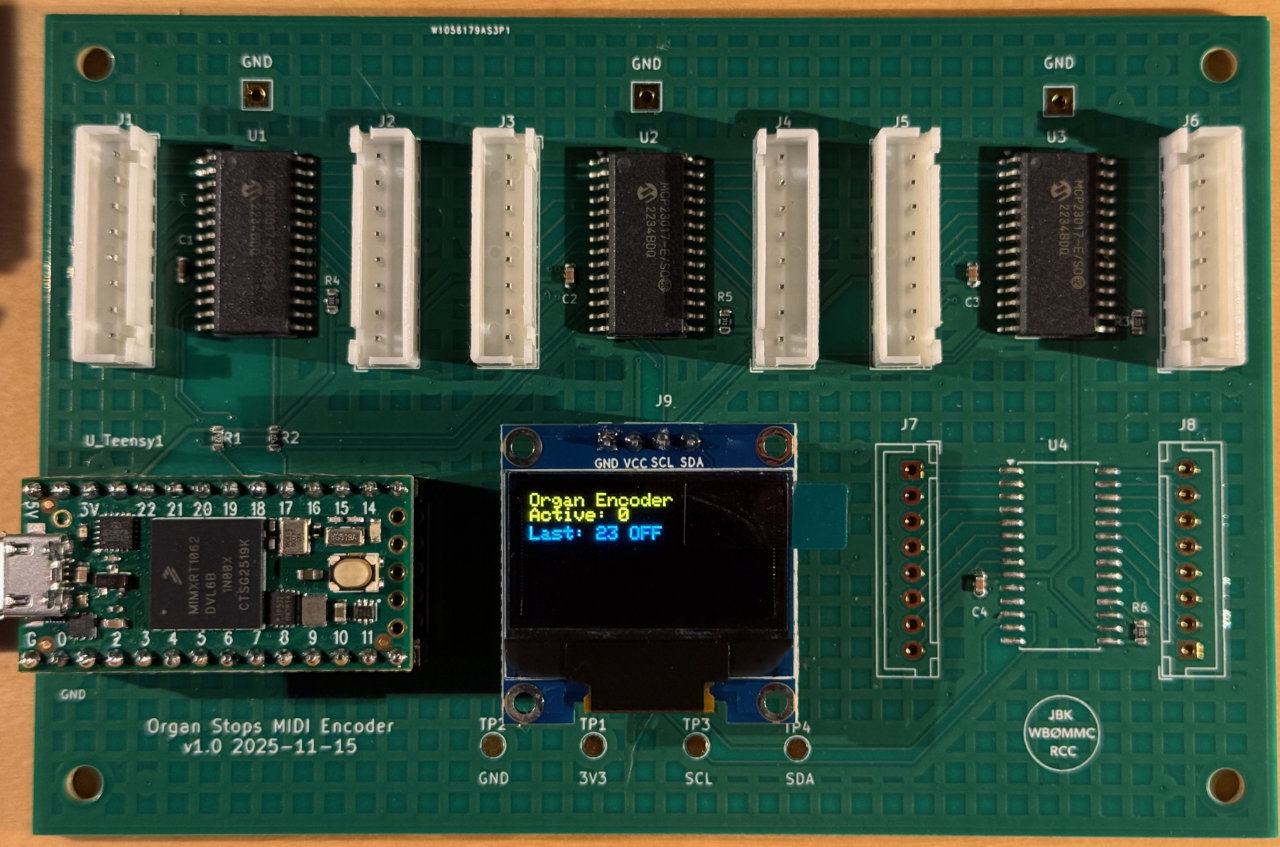
PCBWay fabricated the boards and handled SMT assembly, placing all of the surface-mount components. I completed final assembly by installing:
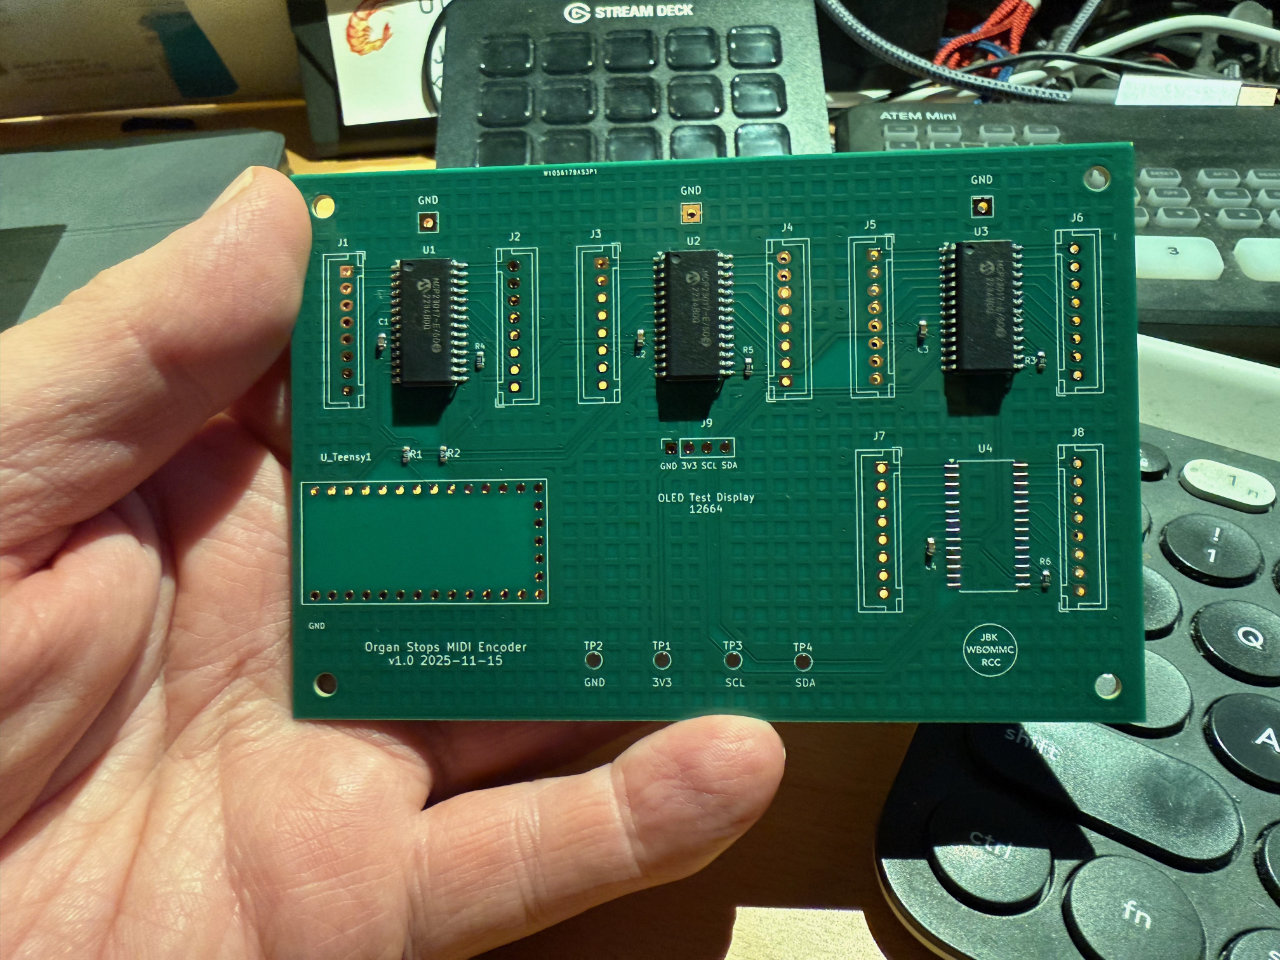
- The Teensy 4.0
- Through-hole connectors for the stop tab wiring
Power and USB connections are handled through the Teensy. Bringing up a new board is always a moment of truth. In this case, it went smoothly. After flashing the firmware and connecting the board via USB, the encoder appeared immediately as a MIDI device on the host computer.
Using MIDI monitoring software, I could see each stop tab generating clean CC messages — exactly as intended.
As the project moved from prototype to production board, PCBWay provided fabrication and partial assembly support for this design. Their assistance allowed me to move quickly from schematic to finished boards, freeing up time for integration work inside the console. I’m grateful for their help in bringing this stage of the Virtual Pipe Organ project to life.
⸻
Firmware: Small Differences, Big Payoff
Although the stop tab encoder shares much of its DNA with the pedal encoder, the firmware evolved in a few important ways:
- Robust debounce logic for mechanical switches
- Per-input lockout timing to suppress chatter
- A power-up MIDI “panic” sequence to ensure no stuck states
- A removable OLED display showing system status and recent activity
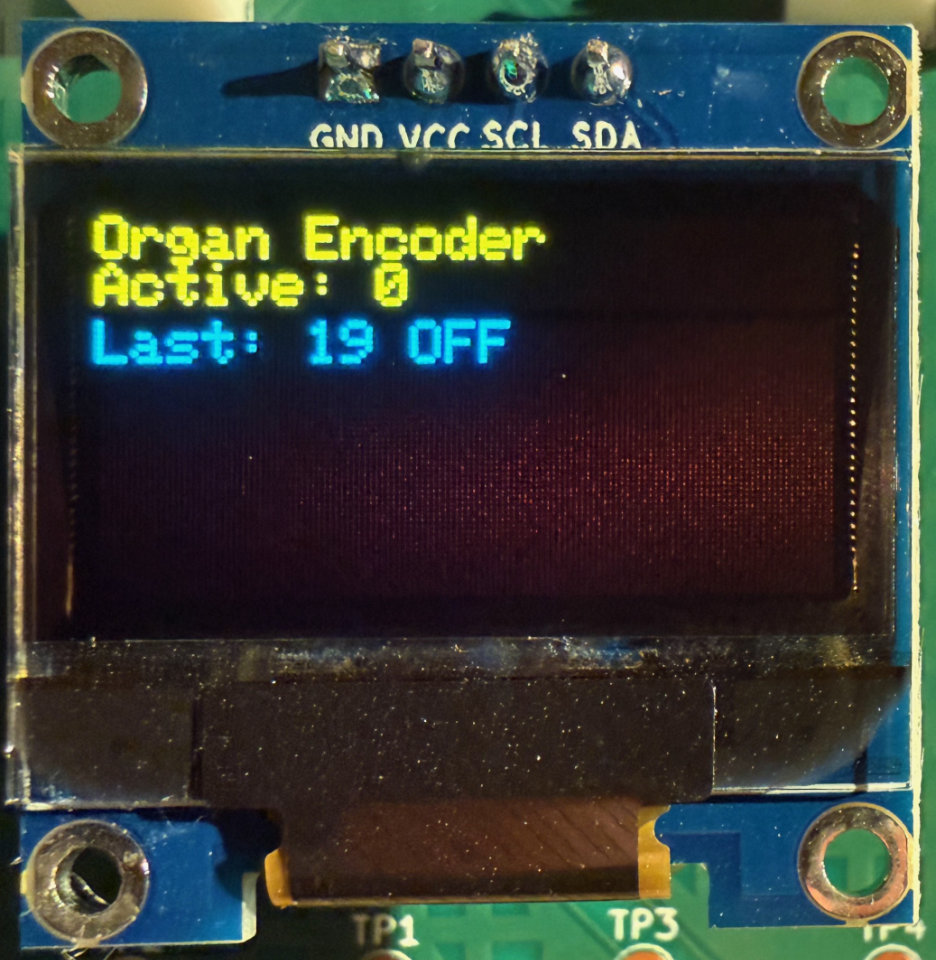
The OLED display turned out to be especially useful during testing. At a glance, it confirms that the system is alive, responsive, and doing what it should.
As with the pedal encoder, the firmware is written in C++ using the Arduino toolchain and is publicly available on GitHub.
⸻
Where This Fits in the Bigger Picture
Both the pedal MIDI encoder and the stop tab MIDI encoder will ultimately live inside the organ console as part of the broader Virtual Pipe Organ (VPO) project. They form the bridge between 20th-century electromechanical hardware and modern software instruments. In effect, we are turning the organ console into a multi-device MIDI Controller.
Together with the pedal encoder described in Part 1, this stop tab encoder forms the core input infrastructure for the Virtual Pipe Organ console.
There is still plenty of work ahead — keyboards, console wiring, computer integration, and the inevitable round of refinements that come with any large project — but the core MIDI infrastructure is now solid.
That feels like real progress.
⸻
What’s Next
With the encoders complete, attention can return to the console itself: finishing demolition of obsolete equipment, installing new manuals, integrating the MIDI hardware, and configuring the Hauptwerk software environment.
As always, this project continues to evolve. That’s part of the appeal.
Pingback:Building a Great Virtual Pipe Organ: MIDI Encoders for Pedals and Stops | Roy Creek Ranch