Weber Piano Action Rebuild – The Circle of Refinement
A process of piano improvement where regulation, voicing and tuning are applied repeatedly, one after another and with ever finer adjustments until the true potential of the instrument is achieved.
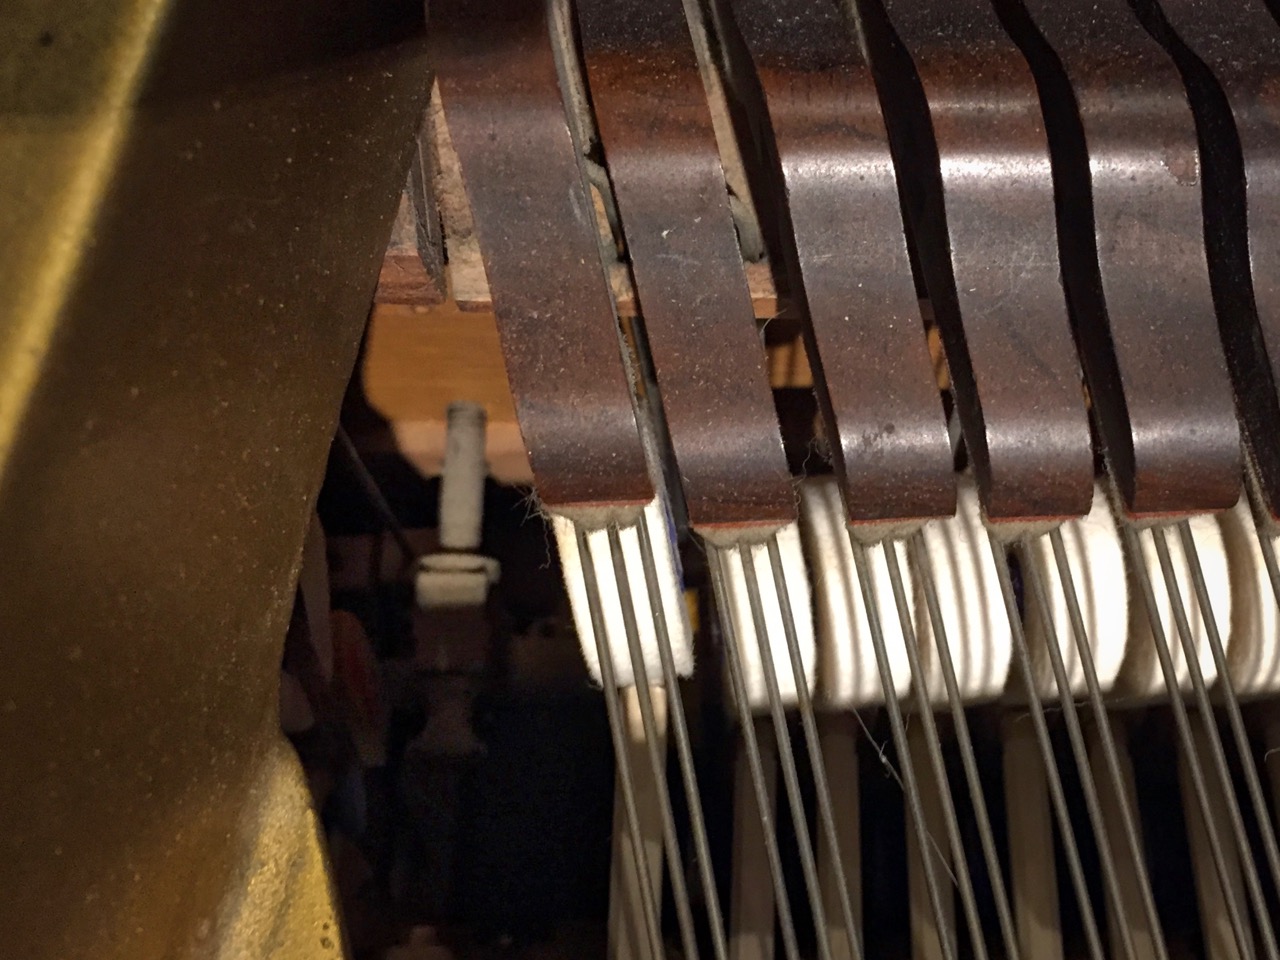
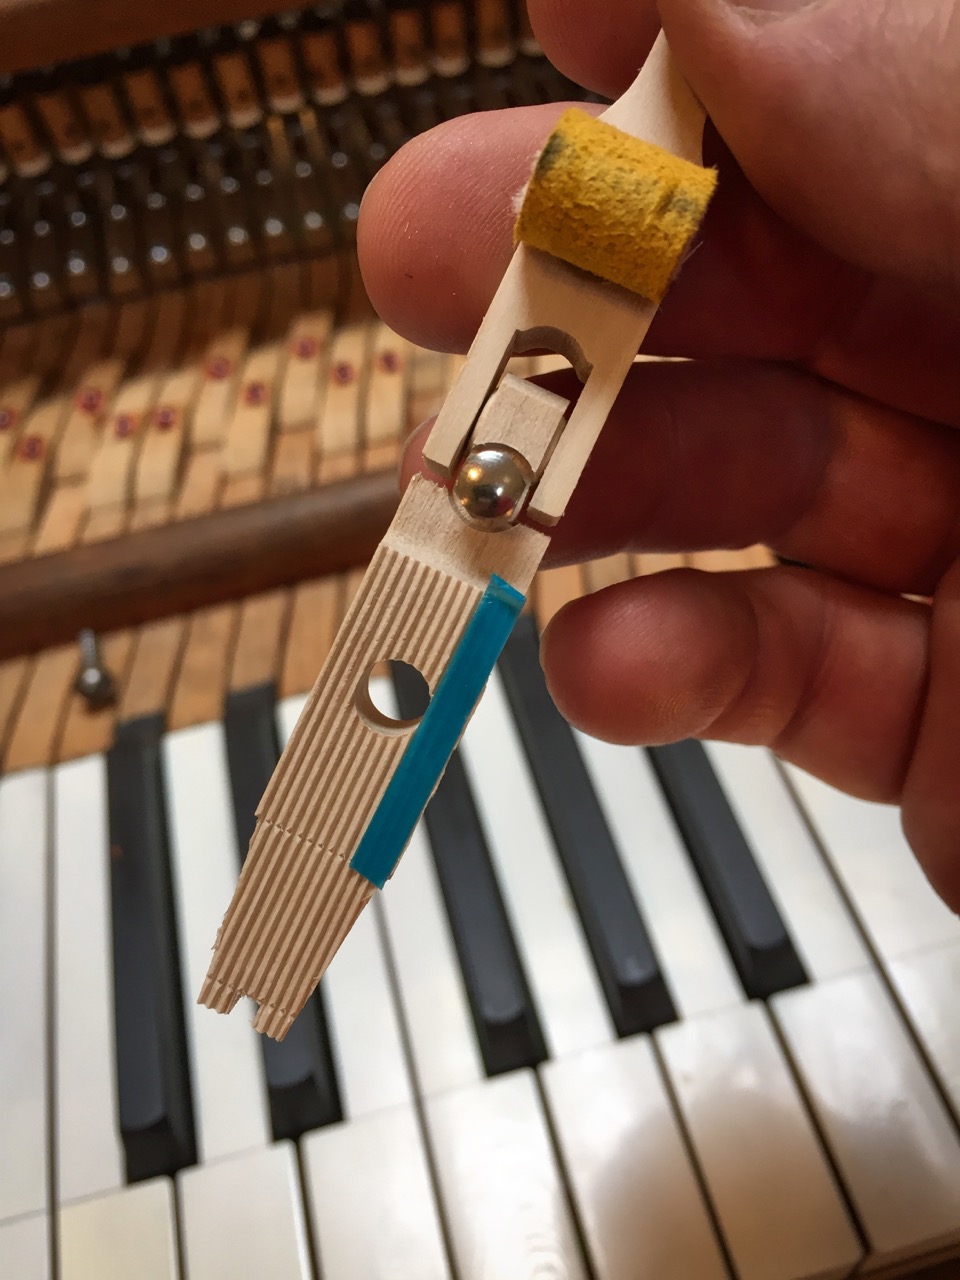
After the much-needed boost of demonstrating the Weber with rebuilt action at our piano gathering, I was eager to continue. Time to align the hammers so they centered on the strings and shifted correctly when the sotto voce pedal (or “soft” pedal, on the left) was pressed. The soft pedal shifts the entire action slightly to the right, with the goal of hitting just two of the three strings on the “triples” (notes 21 and above on the Weber) and one of the two strings on the “doubles” (notes 9 to 20).
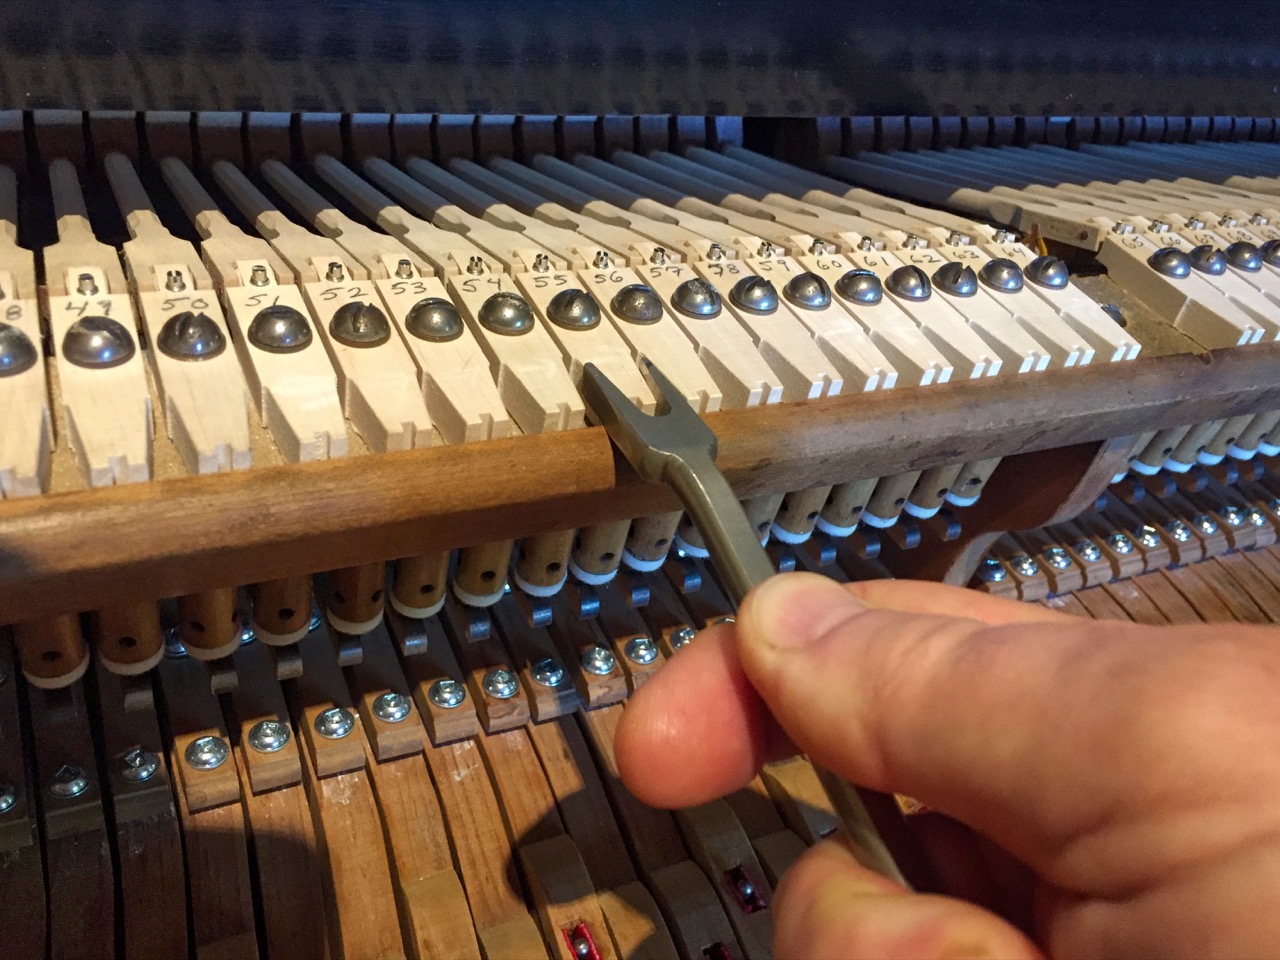
Grand hammer butt spacer in use
One uses a special tool to shift the hammers slightly left and right while the action is installed in the piano. It works by grabbing the butt of the hammer flange from under the pin block. With one note depressed so the hammer is near the string, the technician peers over the pin block while using the “grand hammer butt spacer” tool to twist the flange thus shifting the hammer slightly left or right.
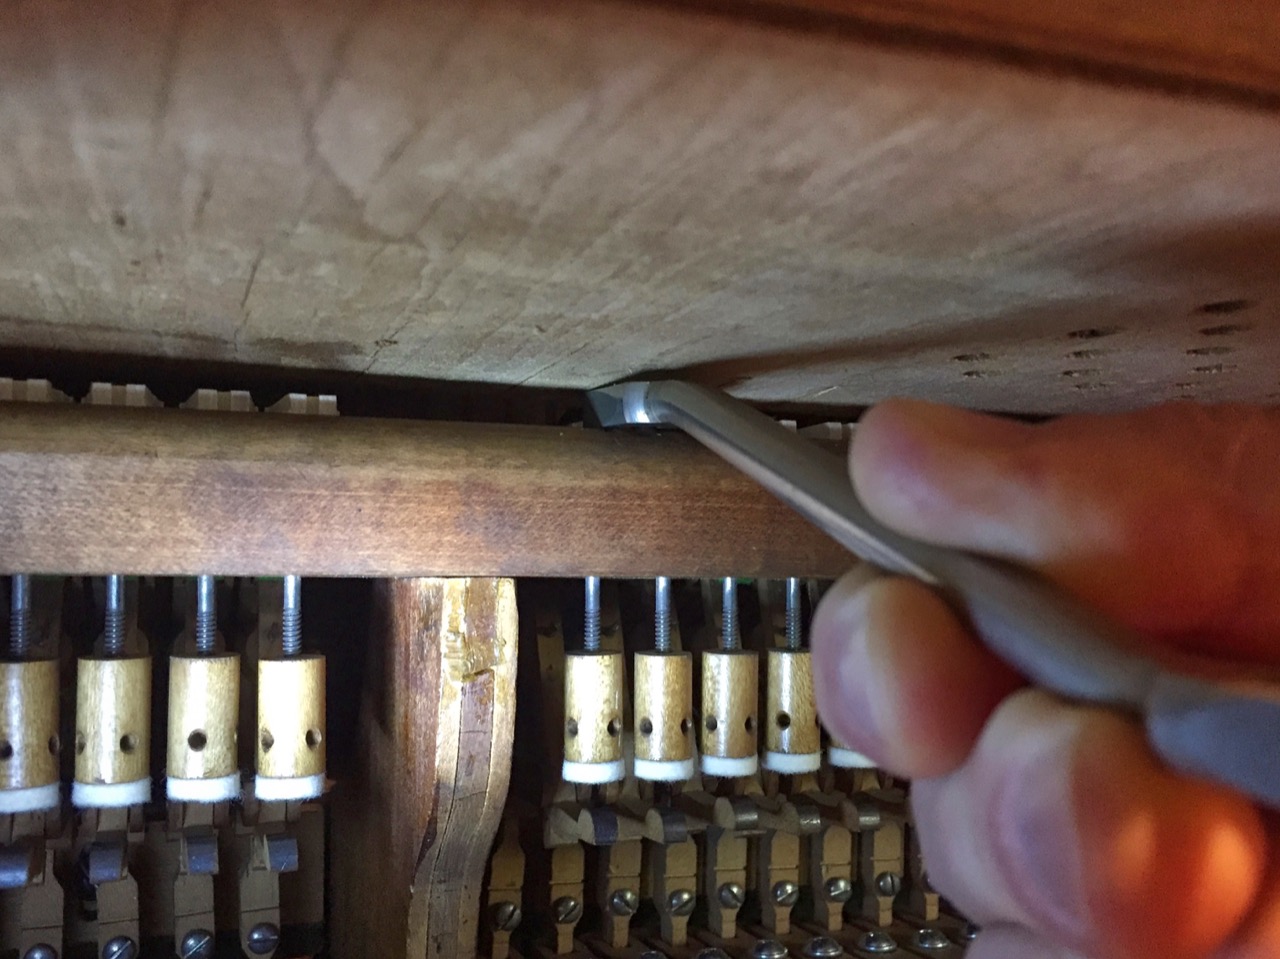
Regulating a hammer butt in place
It is checked to confirm string centering (released) and hitting only one or two strings (doubles and triples) when pressed. There is the added complication that the hammers must not hit any of the adjacent strings when the soft pedal is pressed — not easy with the tight tolerances involved. As I worked, it was clear I couldn’t satisfy both conditions because the action was not shifting enough with the pedal depression.
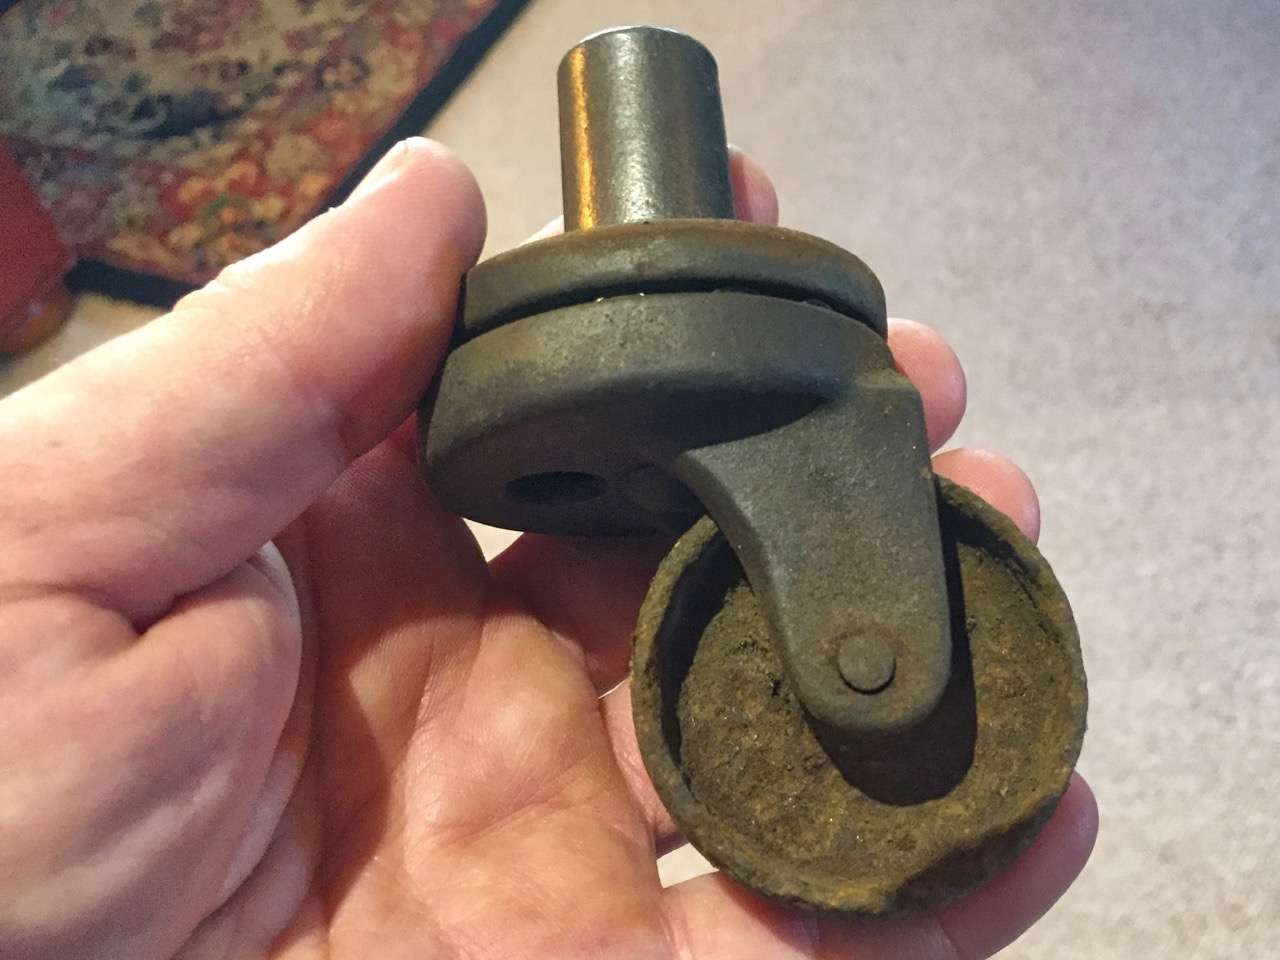
Rusty ‘ole casters
The cause was likely the old, rusted, ruined and rattling casters had been removed from the Weber almost 20 years before. This changed the keyboard height by at least an inch and allowed the pedal lyre to rest directly on the carpeting which in turn interfered with the action of the pedals. It was clear I couldn’t complete the hammer alignment until they were replaced. Bernard and I had looked at some “previously owned” casters during an earlier visit, and I could get some of them.
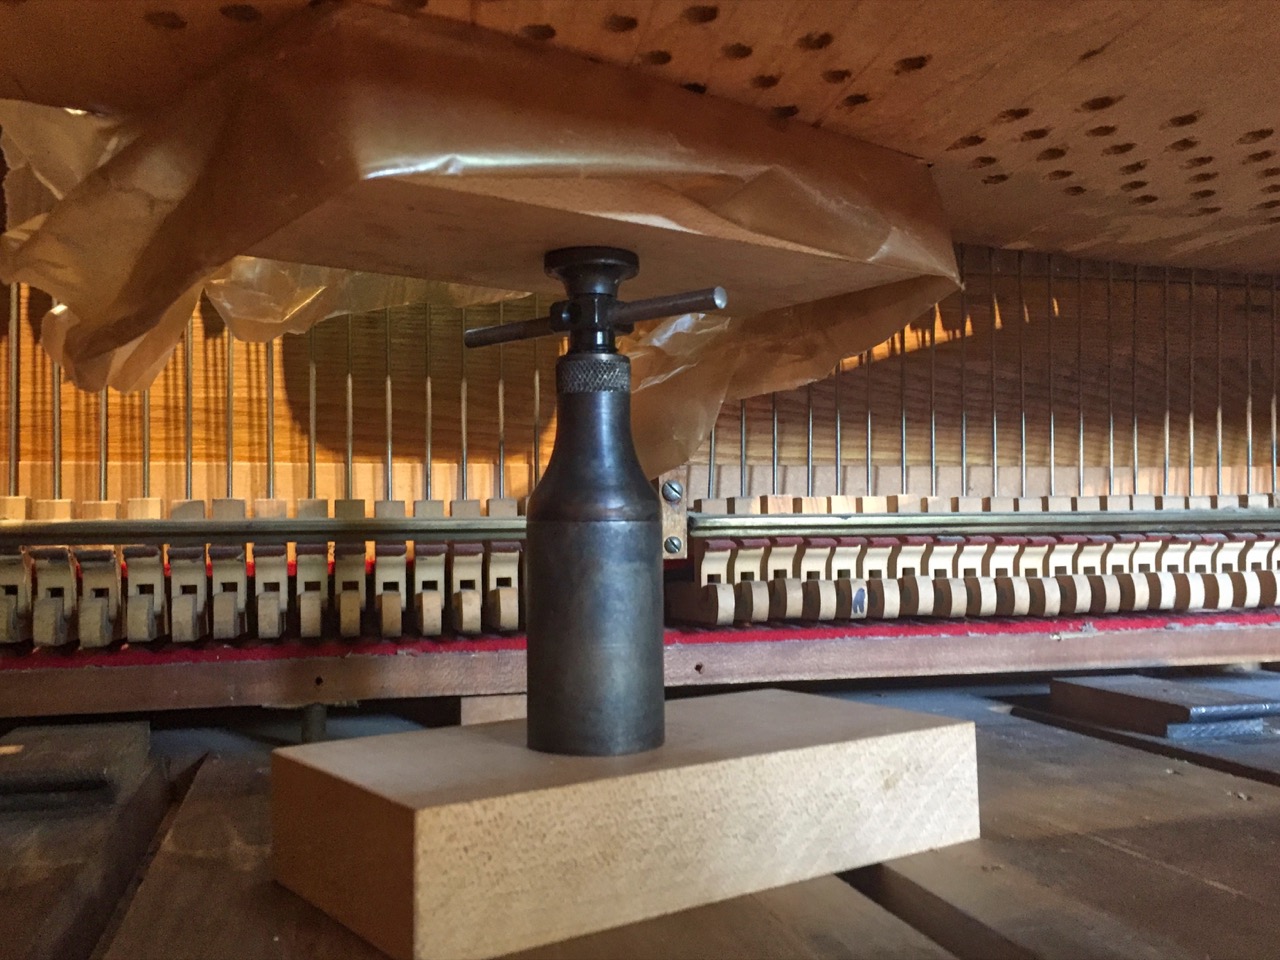
Using a Jack Screw as a pin block glue clamp
I also noticed that some of the hammer flange screws were still scraping on the pin block. This was likely a contributor to the action shifting problem. More planing on the pin block would help, but some laminations had separated from the bottom. They could be re-adhered with some CA glue, but how could I clamp them while the glue cured? Then I remembered the Jack Screw I had used 40 years earlier to restring the Weber. Originally used to support the pin block while pounding in tuning pegs, it could also act as a gluing clamp.
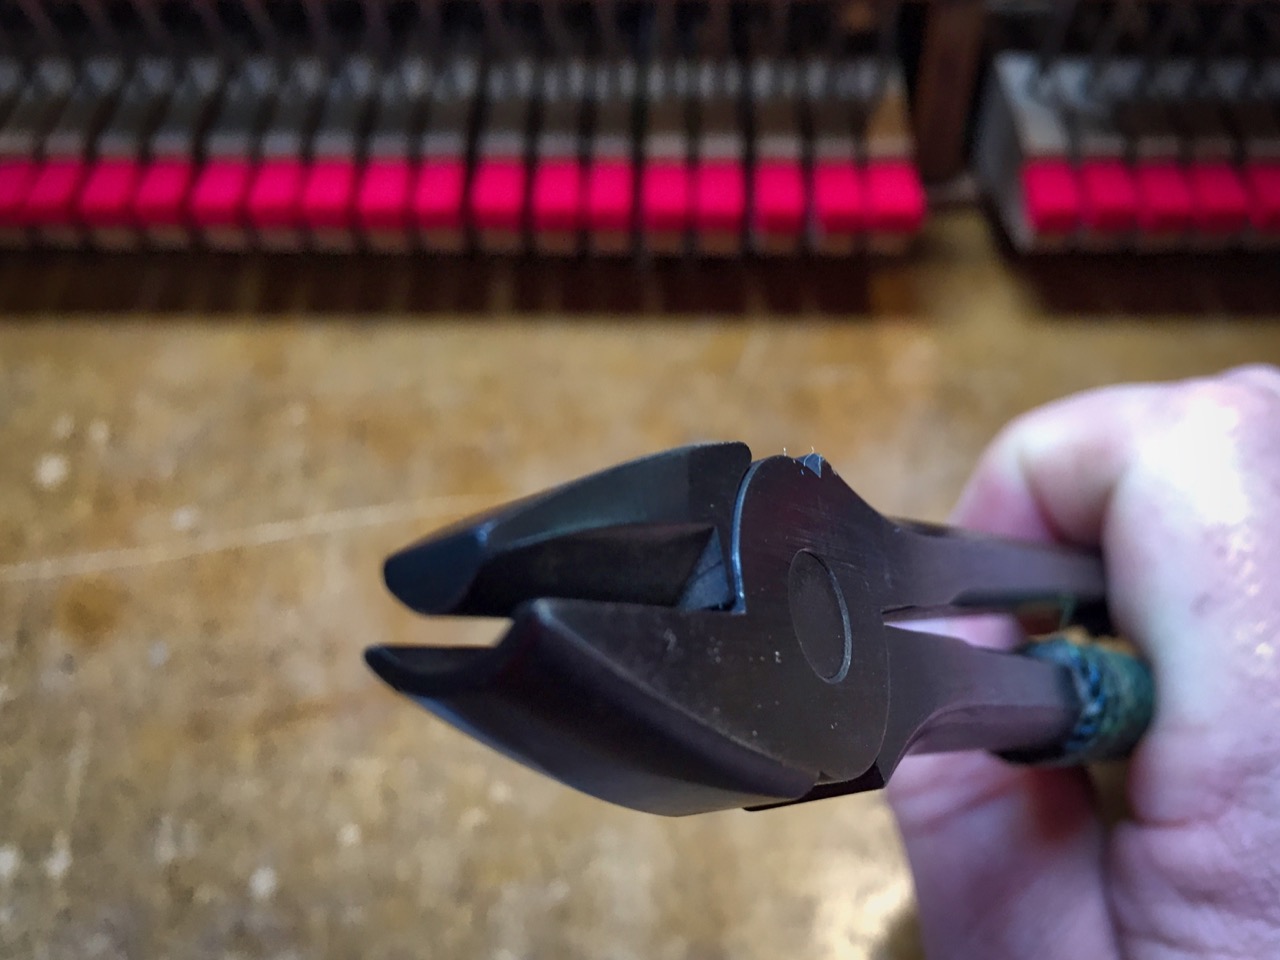
Wire bending or “smiling” pliers
I was looking forward to a day at Bernard’s shop, and ready for next steps after I adjusted the back checks with their “smiling pliers.” Looking over the action he wondered if I had “travelled and burned” the hammers and shanks. The look on my face must have been telling as the words floated into my ears and met with — nothing. Once again, Bernard had gently provided a reality check. There was more to do than I had realized.
“Traveling” ensures the hammers pivot along an arc that is perfectly parallel to each other. “Burning” ensures that the hammers are perfectly parallel when at rest. They are separate adjustments, but effect each other making the process iterative in nature. Celeste got me started.
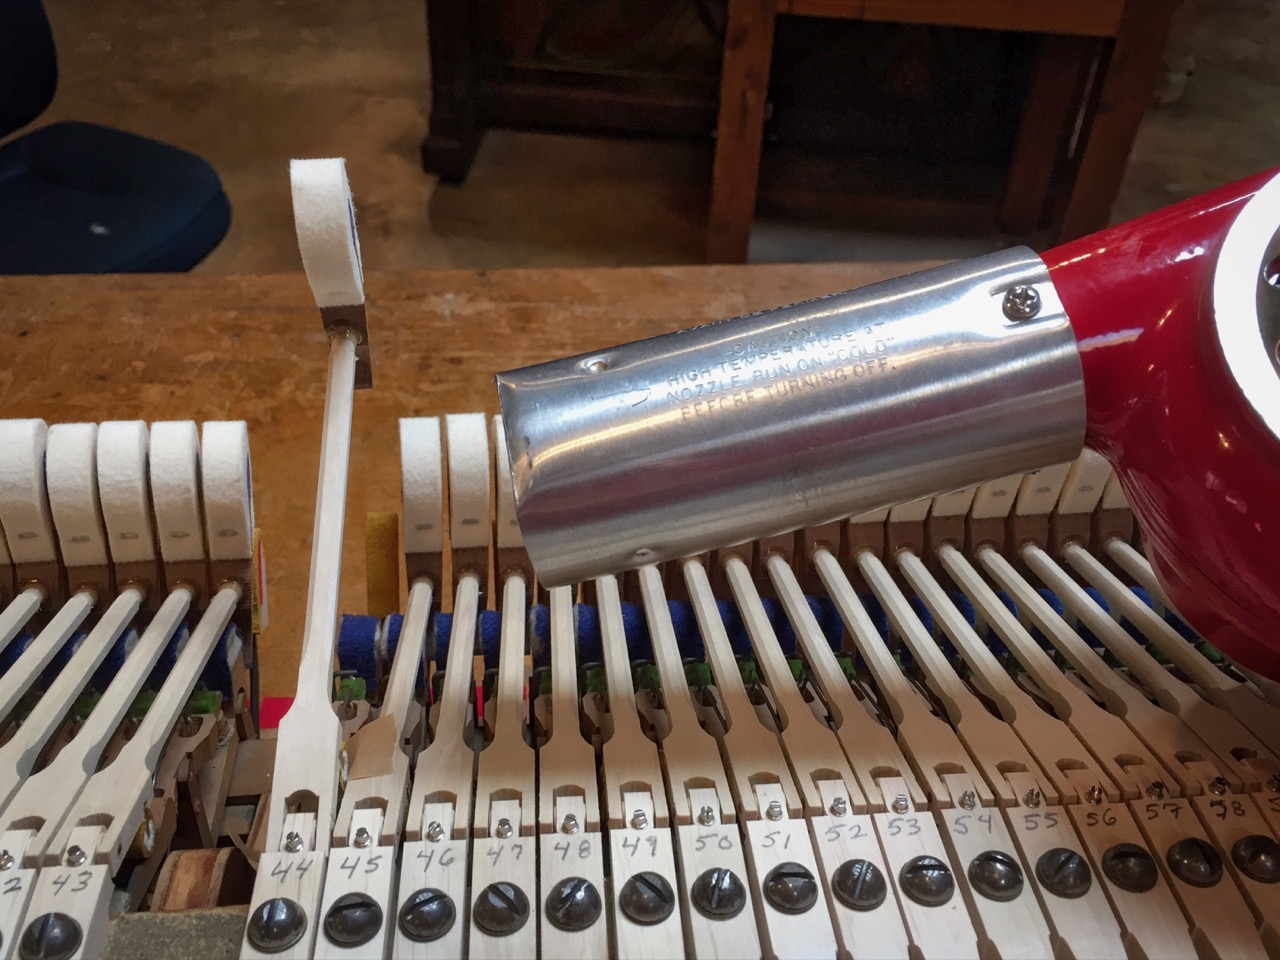
Burning a hammer flange
Even though the new hammers were machine made and mounted, there were subtle misalignments. I couldn’t see them until Celeste pointed out the small twist in this or that hammer evidenced by being out of parallel. “Burning” corrects the problem by heating the hammer shank and then twisting the hammer into alignment. The heat gun is very hot, and is only applied for a couple of seconds at a time, but it is all that is needed. Amazingly, the hammers stay in the new alignment after just a few seconds of heating, twisting and cooling. I worked my way through the action.
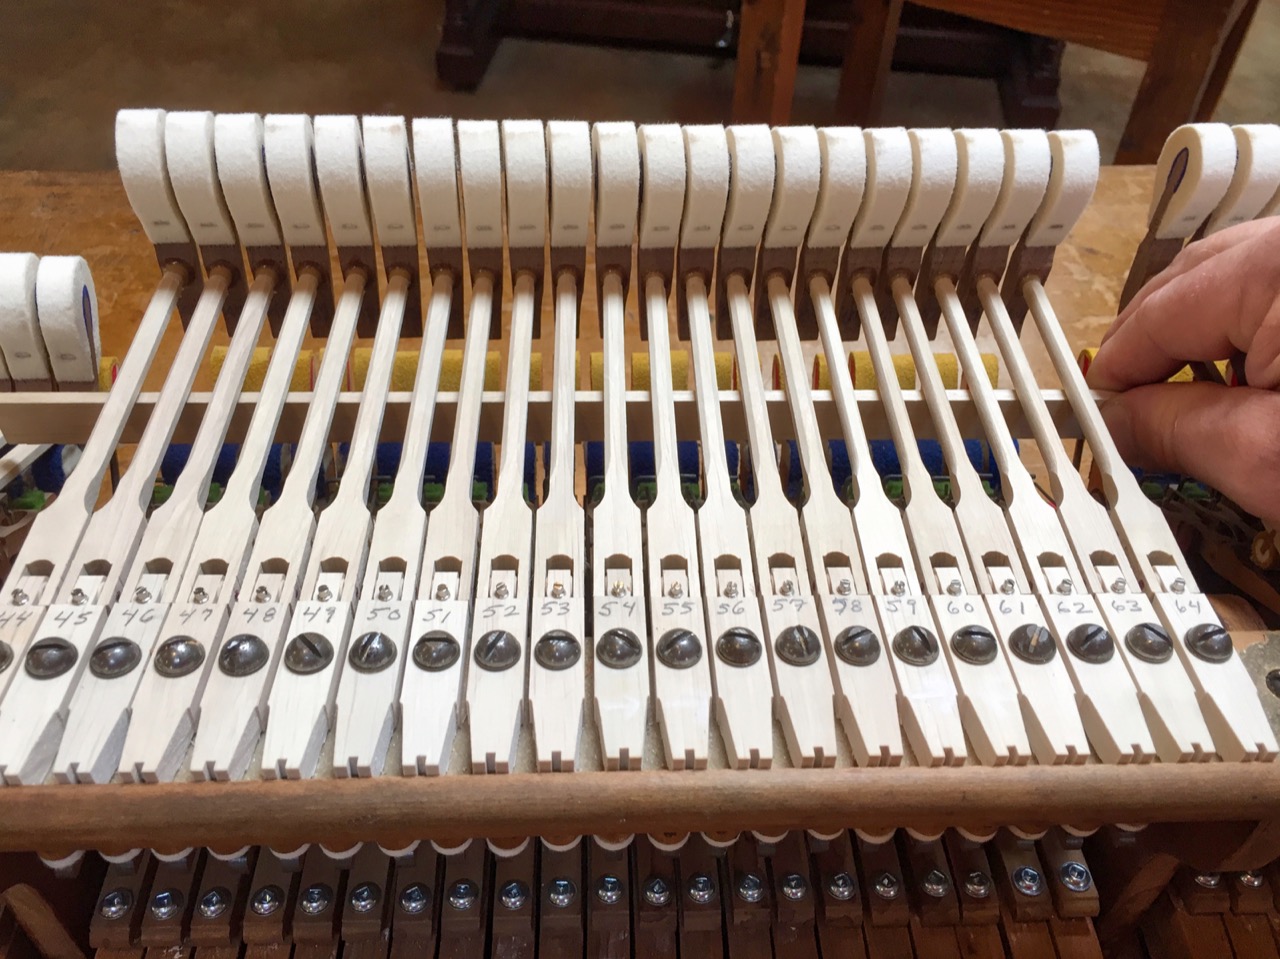
Checking the hammers for travel
“Traveling” is a little more complicated. A long, thin piece of wood (like a ruler) is threaded under a bank of hammer shanks so that they can all be lifted together. As they move, one sights along each hammer, comparing it to the others.
Bottom of hammer flange with travelled adjustment
Any that “travel” to the right or left differently than their neighbors are adjusted by putting thin strips of material under the right or left side of the flange. This works by correcting small alignment errors in the hinge between the shank and flange — ensuring that the hammer travels true. It’s a little bit of a brain twister, because the material is applied to the underside of the flange. I got the hang of it pretty quickly. (no pun intended)
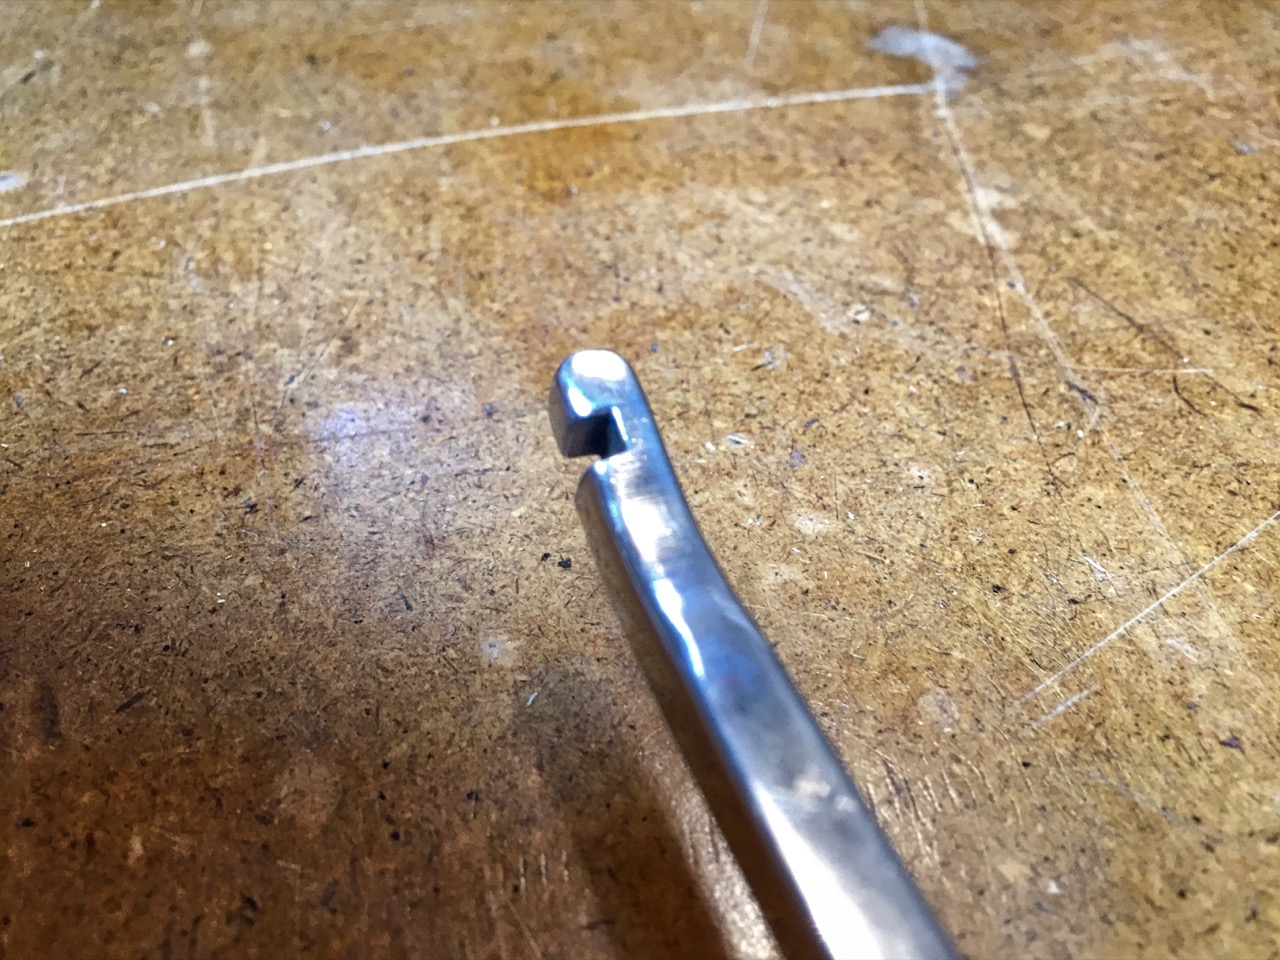
Grand back check regulator
It was finally time to adjust the back checks. Here, we want the tail of the hammer to be grabbed by the back check when the key is depressed, so the back check must be aligned left-to-right and front-to-back. Two tools are used: the “grand back check regulator” and the “wire bending pliers” (aka “smiling” pliers).
We finished the day by looking through Bernard’s caster collection. I considered buying new brass casters, but at $80 each, the $15 used models would be fine — especially since the Weber has “modesty” skirts around them. Not much would be visible. I selected three matching brass casters that would clean up with a little buffing. As I was leaving, I mentioned the challenge of adjusting one set of parameters on the action only to have previous adjustments change as well. Bernard assured me this was normal, and mentioned The Circle of Refinement. It was clear that I am just at the beginning of that circle.


Pingback:Weber Piano Action Rebuild – Assembly and Adjustments | Roy Creek Ranch
Pingback:Weber Piano Action Rebuild – RTFM | Roy Creek Ranch
Pingback:Weber Piano Action Rebuild – Baby Needs New Shoes! (Err, Casters) | Roy Creek Ranch