Weber Action Rebuild – Removing Bushings and Cleaning
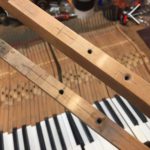
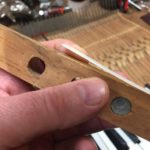
After bringing the piano keys home from Bernard’s shop last week, I was hoping to remove the key bushings and clean the wooden, ebony and ivory parts. To remove the bushings, I rigged up an old travel-sized clothes steamer and a pair of right-angle tweezers with pointy jaws and set to work. The work is not difficult, but there are two bushings per key, and it takes time to complete the operation 176 times. It took several hours and an audio book really helps pass the time.
Scrubbing the wooden parts of the key with Scotch-brite was next. Stacked together, one can scrub across the grain and make progress quickly, but it was soon evident that each key would have to be scrubbed individually to get all the surfaces. Also, what about the rockers? It would be much easier to remove all of them to finish cleaning the keys. Something to ask my mentors about. The damper bushing would probably need to be replaced as well. Another question. I finished the process by wiping each key down with a damp paper towel to remove all the debris. In all, I spent about 7 hours on these tasks.
Back out to the piano shop. Bernard agreed it would be best to remove the rockers, although he suggested numbering them so they would get back to their original key. This took about 30 minutes. I continued scrubbing the key surfaces below the rockers.
There was time to talk with Celeste while we worked. She was busy with another action, and began to outline the other steps. How many I implemented, and to what degree, depended largely on cosmetics. Did I want the keys to look like new, or would improving their function be sufficient? Since the keyboard is the only part of the action rebuild that will be visible, I decided cosmetic improvements were needed. As we discussed the project, the following list emerged.
For all keys:
-
Remove old bushings (complete)
- Remove dirt with Scotch-brite (nearly complete)
- Remove damper lifter felt
- Treat the wood with a solution of Oxalic Acid. This lightens the wood and removes dark spots and streaks.
For the “sharps,” ebony keytops
-
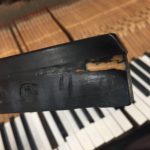
Check for cracking around the bushing mortice and repair with cyanoacrylate glue as necessary
- Remove wood on either side of the mortice to facilitate new bushings
- repair damaged wood between ebony keytops and keys by slightly enlarging raw wood exposures and filling with Mohawk Epoxy Wood Putty
- Re-touch black over repaired wood with Pica Black Marker or black paint for larger repairs
-
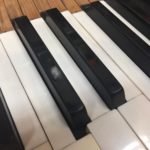
Sand ebonies with 220 and then 400 grit sandpaper to remove damaged lacquer finish
- Treat ebonies with 2 applications of Waterlox (similar to Danish Oil)
- Finish with Conservator’s Wax
For the “naturals” keytops:
-
Sand bottom of key under ivory keytop to remove punching discoloration
- Check and repair any loose natural ivories using a thin hide glue with whiting
After all of that, it will be time to install new bushings. I’ll save that for a separate post. Looks like I have my work cut out for me this week!


Pingback:Weber Action Rebuild – Key Cleaning Update | Roy Creek Ranch
Pingback:Weber Grand Piano Action – Teardown | Roy Creek Ranch