Weber Grand Piano Action – Teardown

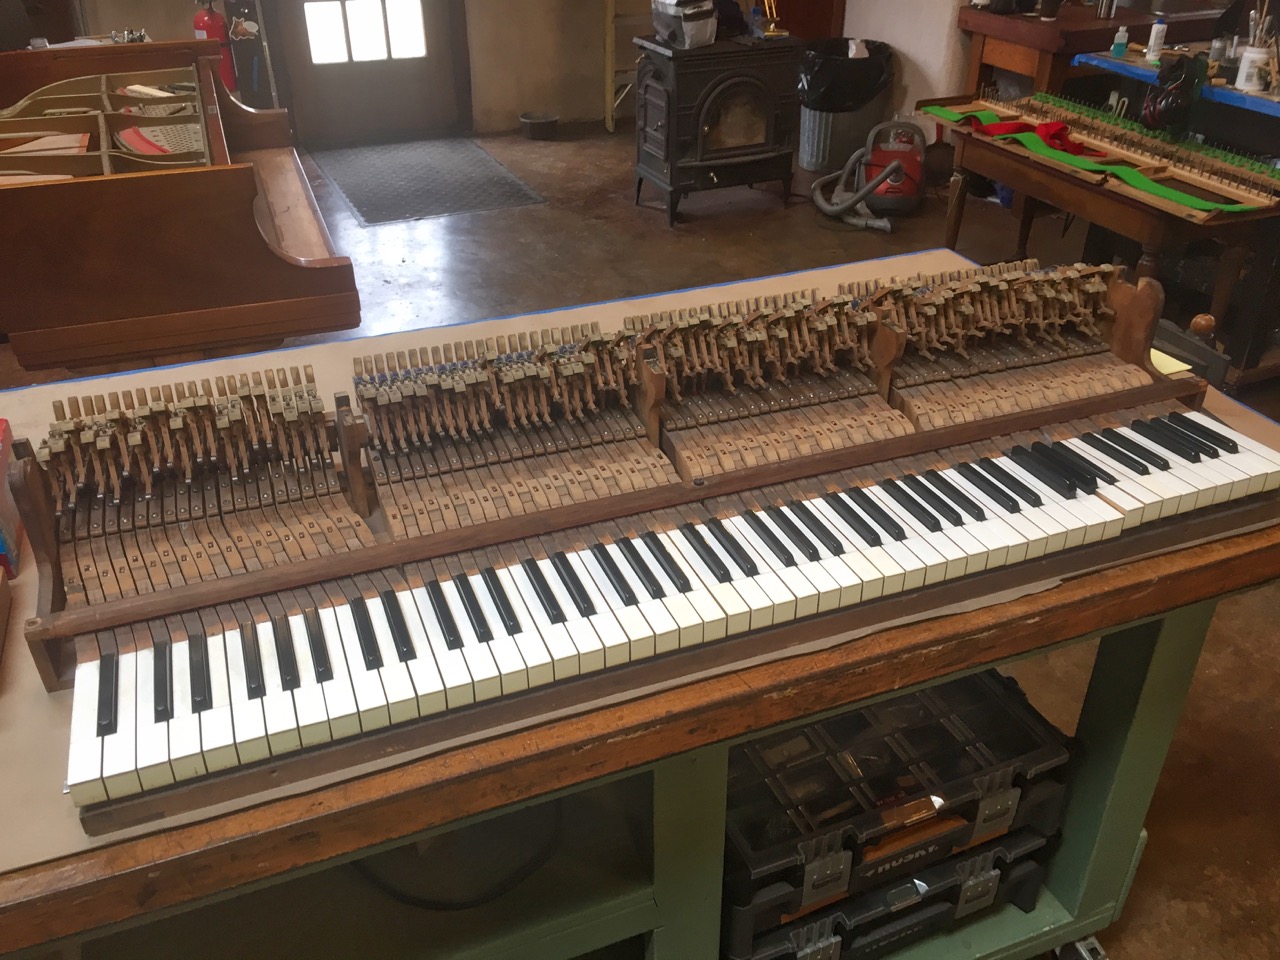
View from the shop
After months of discussion and planning, we were ready to rebuild the action in the Weber grand piano. I had moved the action to Bernard Mollberg’s shop near Blanco, Texas the previous week, and was looking forward to starting. Arriving at the shop around 11, Bernard began my instruction. I hoped to have decisions regarding hammers, shanks and how new ones are ordered. But first, Bernard wanted me to have some time adjusting the antique rocker capstans that the Weber used.
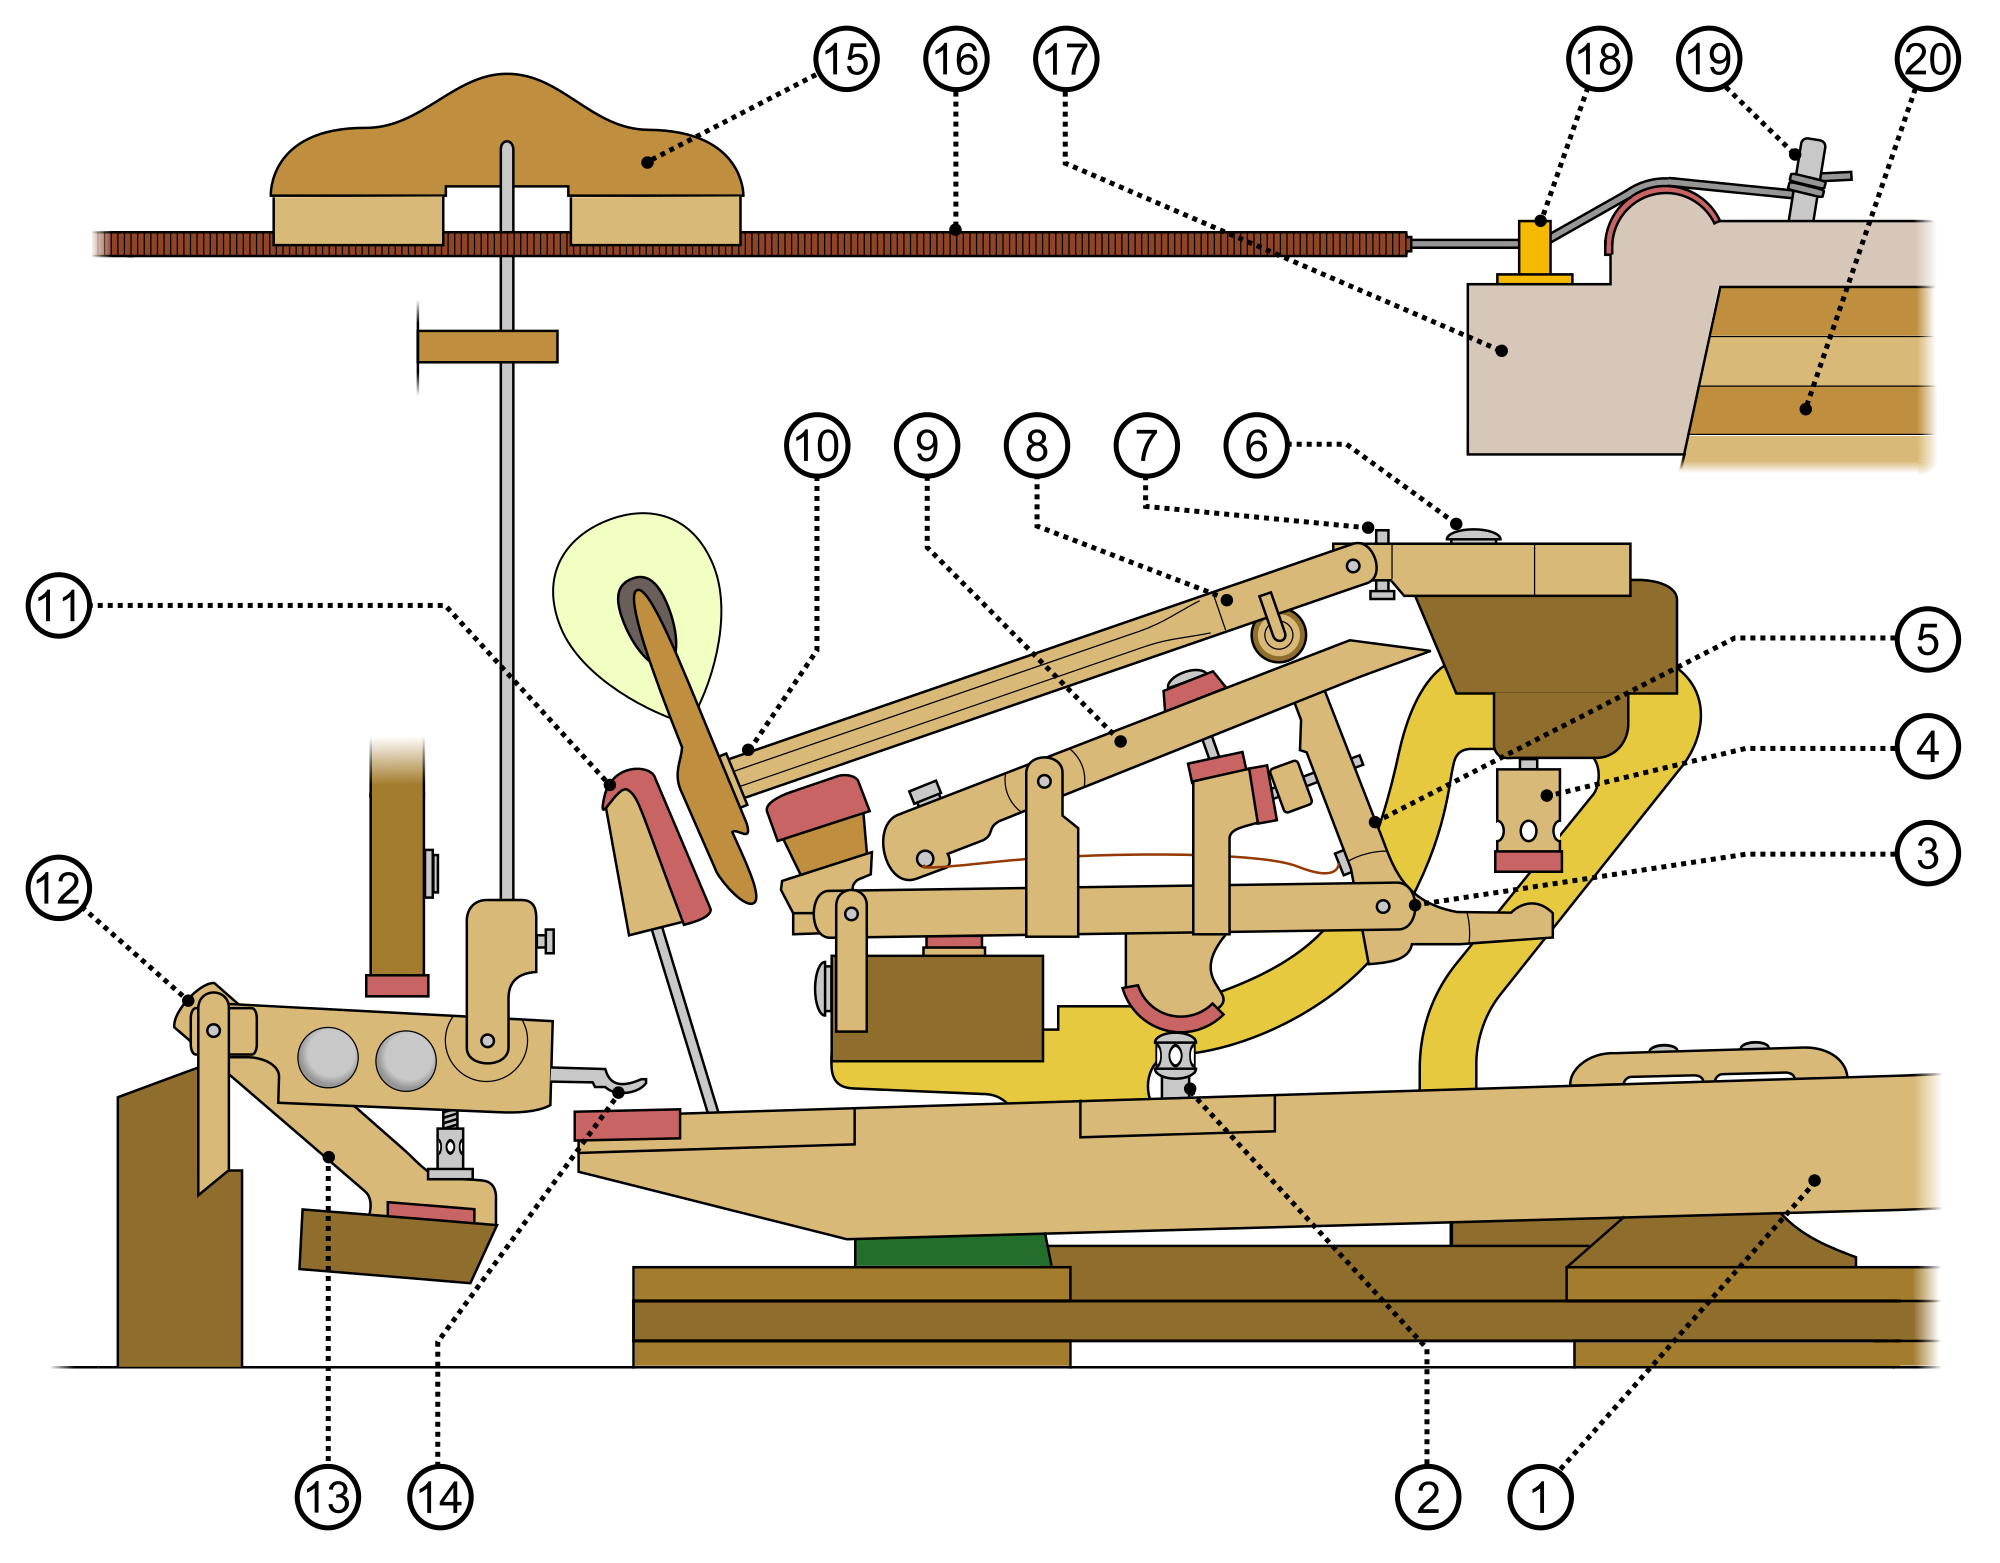
Grand Piano Action
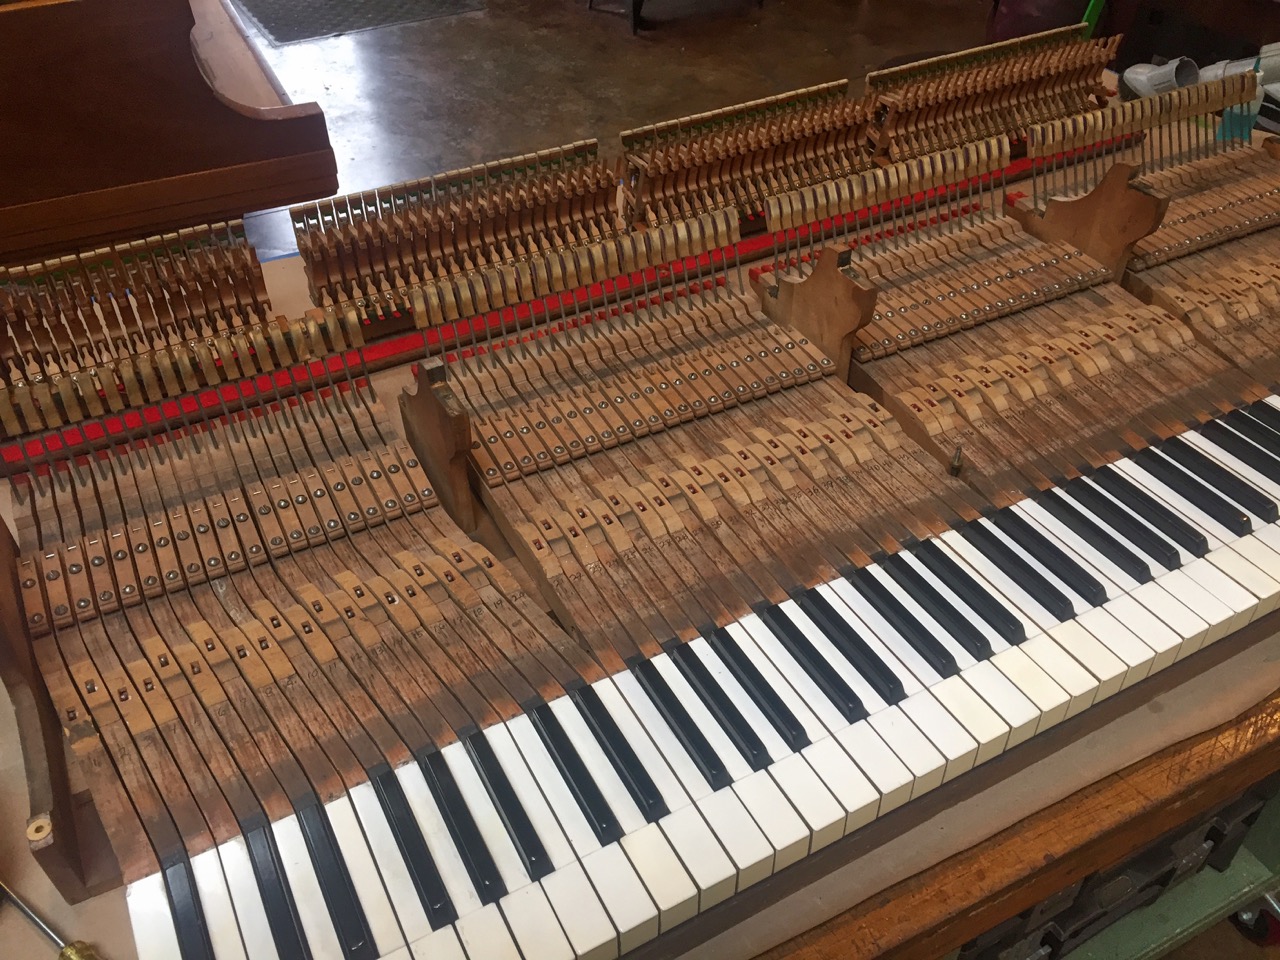
Modern pianos have a single capstan (2) on each key (1) that actuates the rest of the piano action. Located at the opposite end of the ivory, it moves up when each key is pressed down, sending the wippens (3) up which in turn actuates the hammer (8, 10). The Weber has an older style of connection between the key and wippens that was abandoned by piano manufacturers around the turn of the 20th century. It’s easy to see why. Where modern capstans require a single adjustment to set the hammer height, the rocker style requires two, and these slotted screws are adjusted with a small right-angle screwdriver. Not very convenient. Bernard prefers replacing this arrangement with a modern wippens and capstan. There are challenges with this approach however. Some re-engineering of the action is required because no manufacturer supplies a replacement wippens that makes this conversion. Also, it substantially increases the cost of the action rebuild.
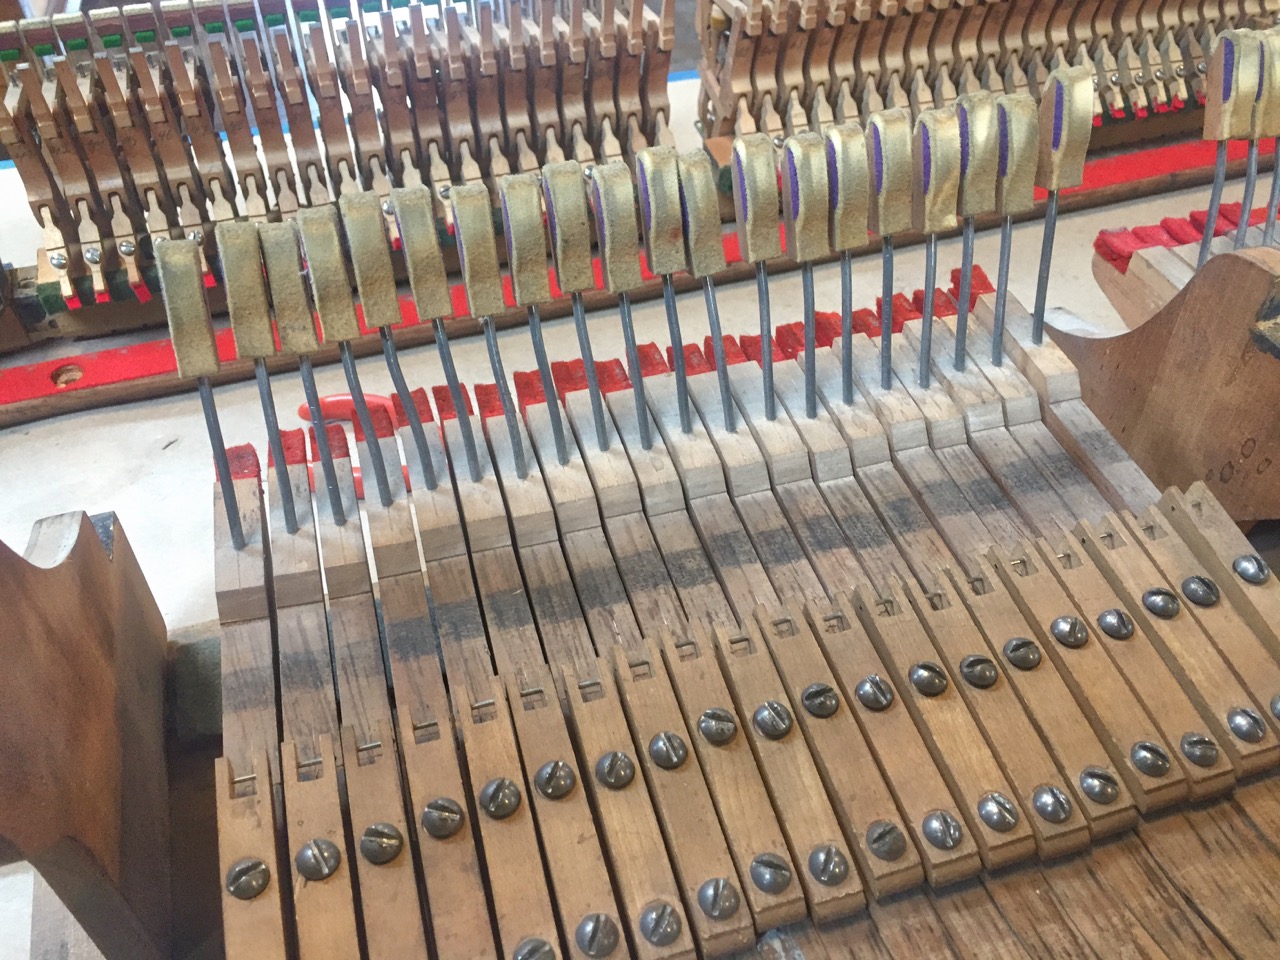
Rocker Capstans
On the other hand, besides being a more cumbersome adjustment, the existing wippens are decades old, and have other antique features such as silk cords that tie spring elements to the mechanism. They seem to be ok now, but how long does silk last? Finally, removal and installation of each wippens is difficult because it physically connects with the key with a wooden clamp instead of simply resting on a single capstan screw as in modern actions.
I adjusted several keys for hammer height, and it wasn’t too bad. Given that I will be the tech working on this piano for the foreseeable future, I think I can live with the current arrangement. Keeping an open mind, but not ready to replace the old wippens just yet.
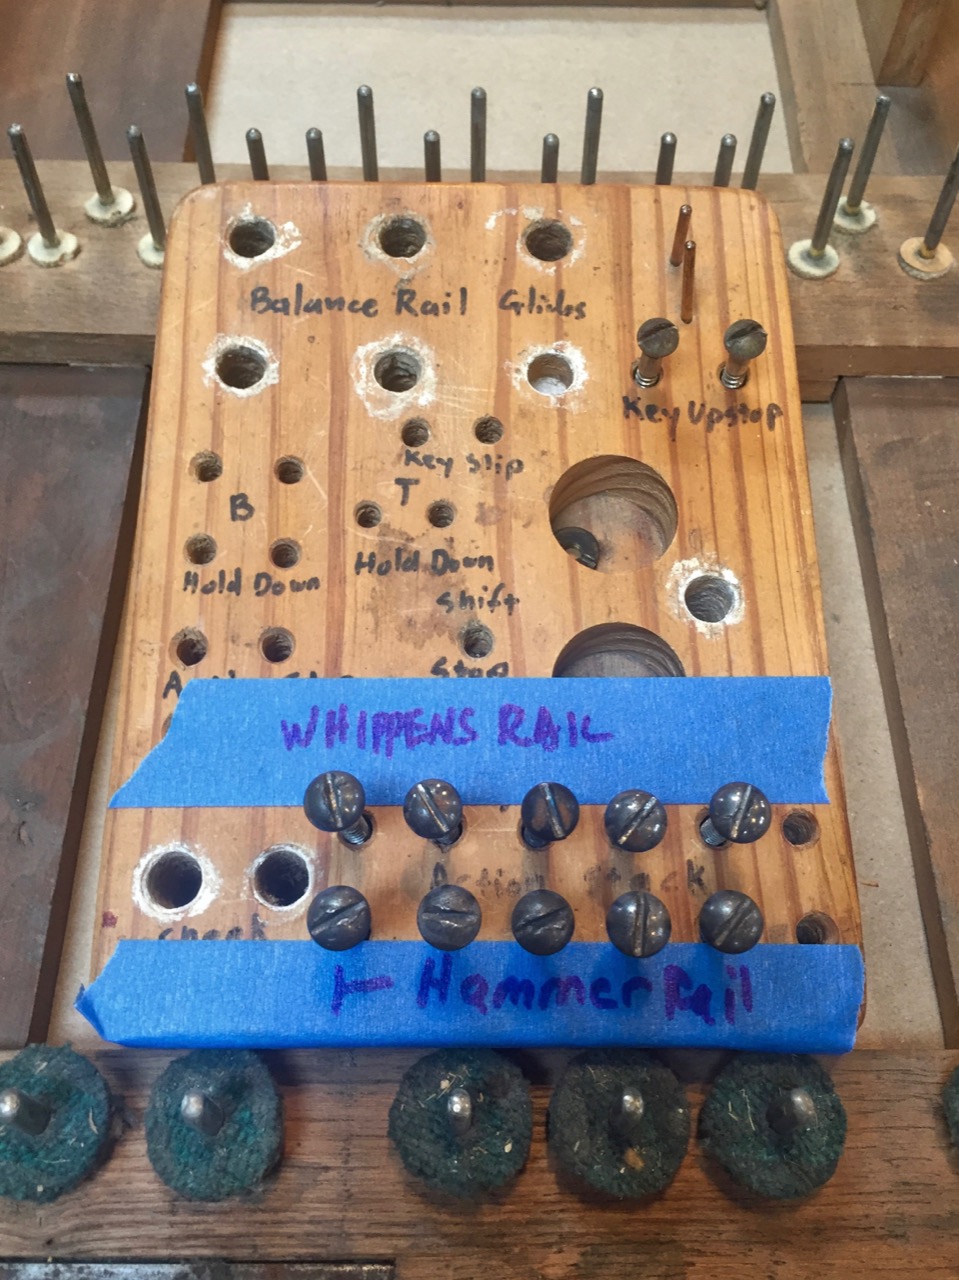
parts storage
I began the teardown. This piano has mostly wooden parts unlike modern instruments which use steel brackets to support the action stack. I removed the hammer rail, being careful to place each screw into the drilled and marked wooden block intended to keep those parts identified with both function and location. The rail then lifts off with all the hammers and shanks attached. Next, the wippens rail. It screws into the action stack from the back, and is easy to remove after all 88 of the wippens/key clamp connections have been released. Finally, the upstop rail is removed. This allows the removal of all the keys from the keybed.
Action with hammers removed
Wippens rail removed
I was down to the nearly bare keybed. Celeste, an action specialist in Bernard’s shop, took up the instruction. First, although each key is stamped with a number from 1 to 88, she recommended relabeling them with a pencil for visual clarity. A general cleaning was in order since there was several decades of dust and funk on the now disassembled parts.
keys safely stored
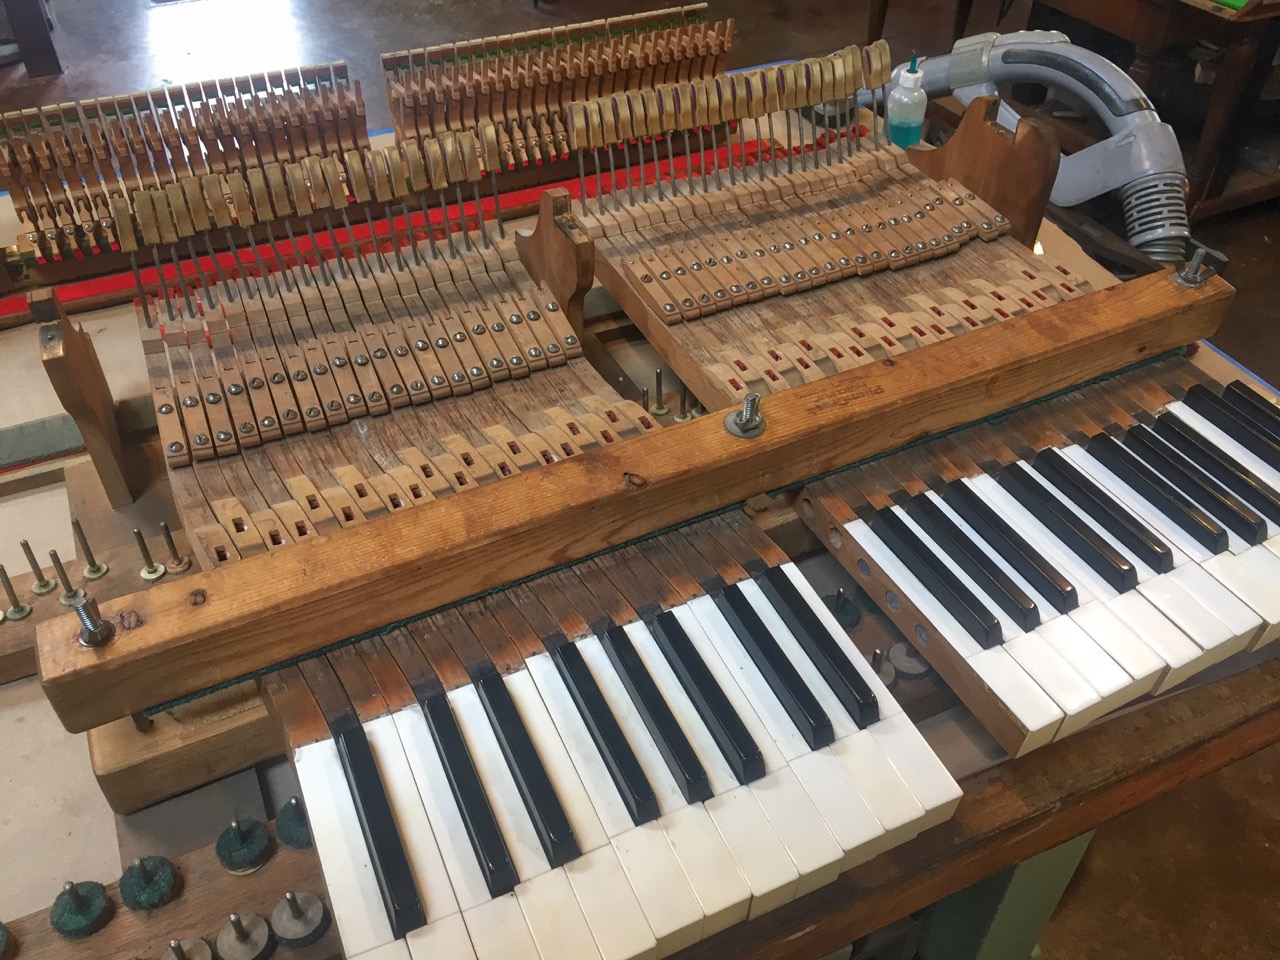
As I removed the keys to expose the keybed, they were put into a key storage frame — a kind of wooden clamp that both protects the keys and keeps them in order. Once in the frames, she got an electric drill with a custom bit installed that would remove the back checks. These are threaded on the end of a steel wire at the back of the key and “catch” the hammer as it rebounds from the string to prevent multiple hammer strikes. This took just a few minutes with the drill.
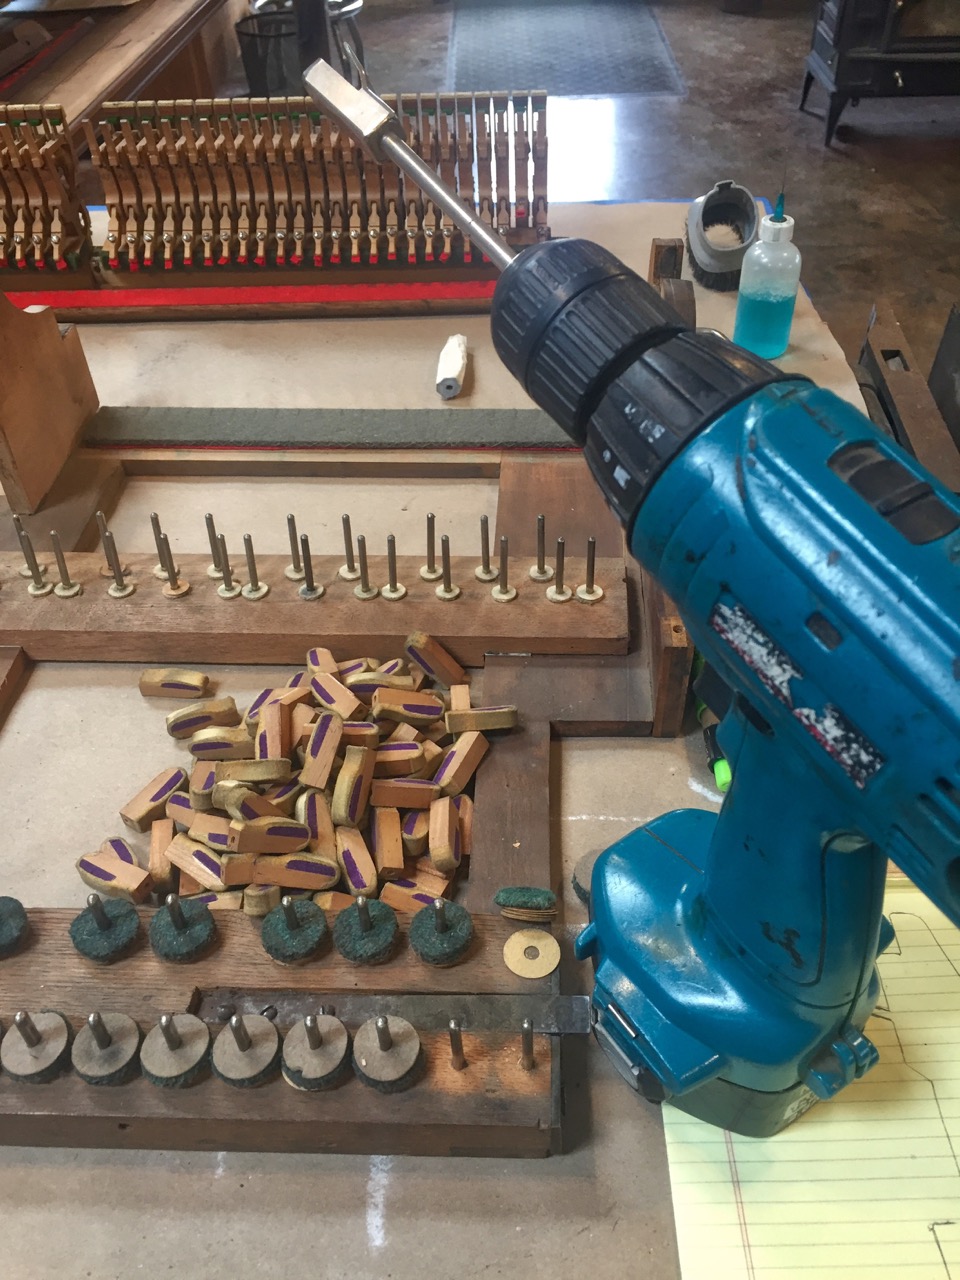
Back check remover
Now I got some instruction on my homework. The keys needed to be cleaned, and red Scotch-brite could be used to scrub the wooden surfaces. We discussed the ivories (which are real on this piano) and decided they look pretty good for their age. Since we can’t really improve them, we’ll leave them alone. Finally, all the felt bushings must be replaced. There are two sets in each key and the red felt is attached in the slot with animal hide glue. This is good because it is easily released with either Windex (the ammonia is the solvent) or steam. My mission, should I choose to accept it, is to clean the keys and remove the bushings.
What’s next? Removing the felt punchings that each key rests on in preparation for pin alignment and polishing, light sanding of the keybed and replacement of the punchings. That’s where we’ll start next week.
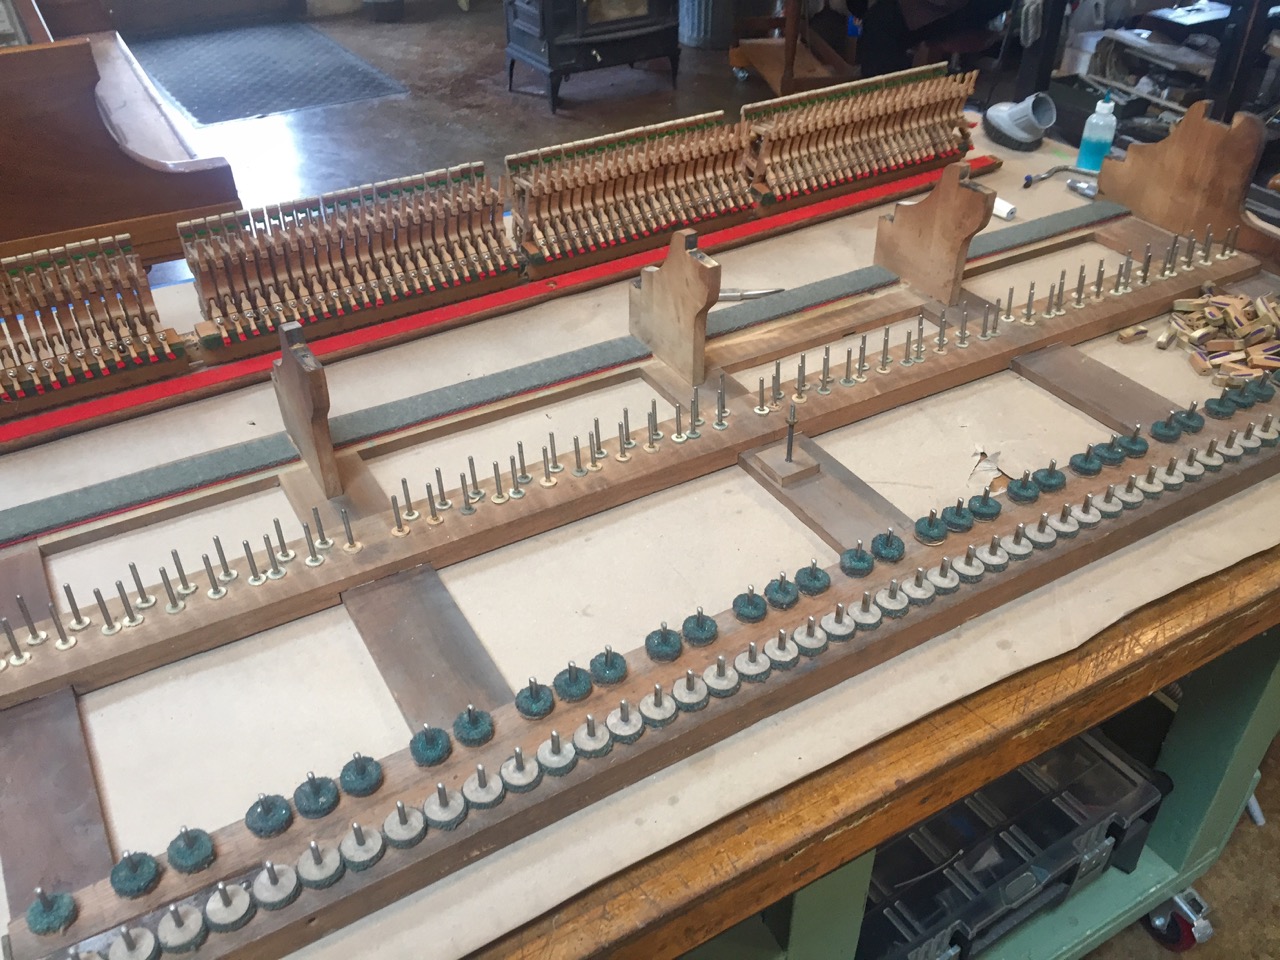
stripped down to the keybed
Pingback:Rebuilding another Piano – an 1893 Weber Grand | Roy Creek Ranch
Pingback:Weber Piano Project – New Bushings! | Roy Creek Ranch
Pingback:Weber Action Rebuild – Removing Bushings and Cleaning | Roy Creek Ranch
Pingback:Whirlpool Dishwasher Repair | Roy Creek Ranch